

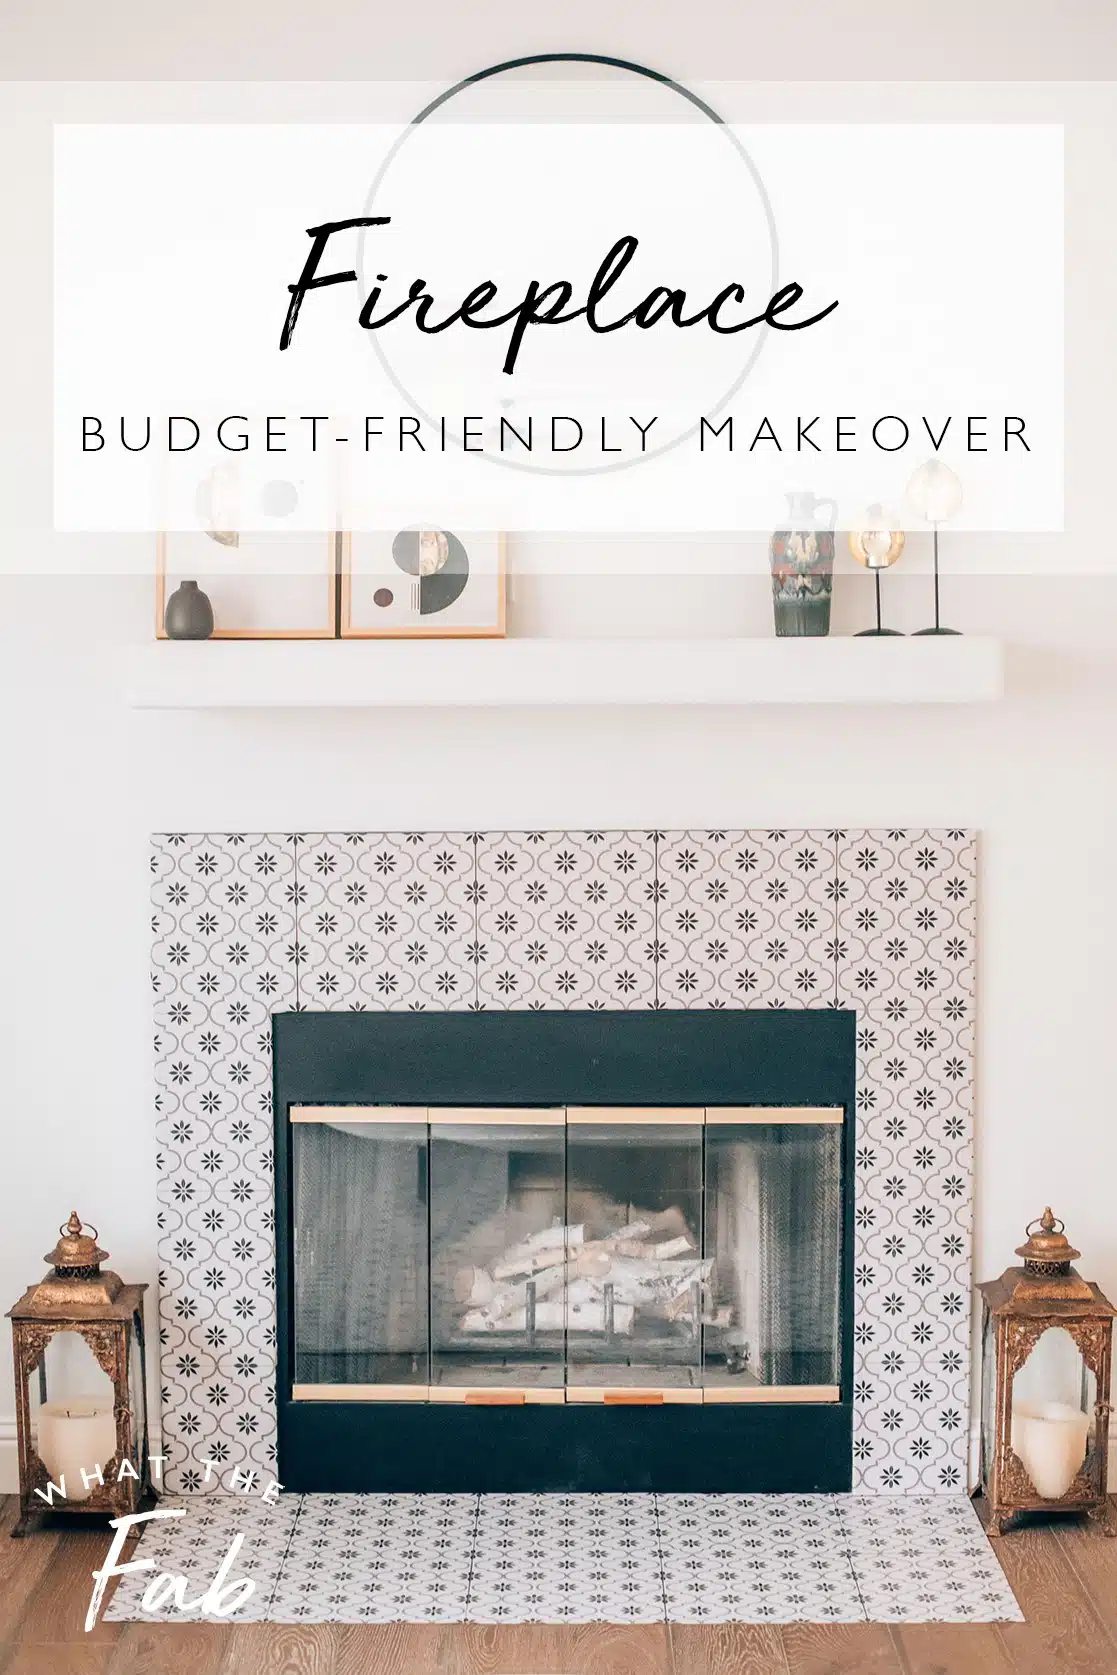
We just got done with updating one of our fireplaces with an easy, budget-friendly DIY: Fireplace stickers!
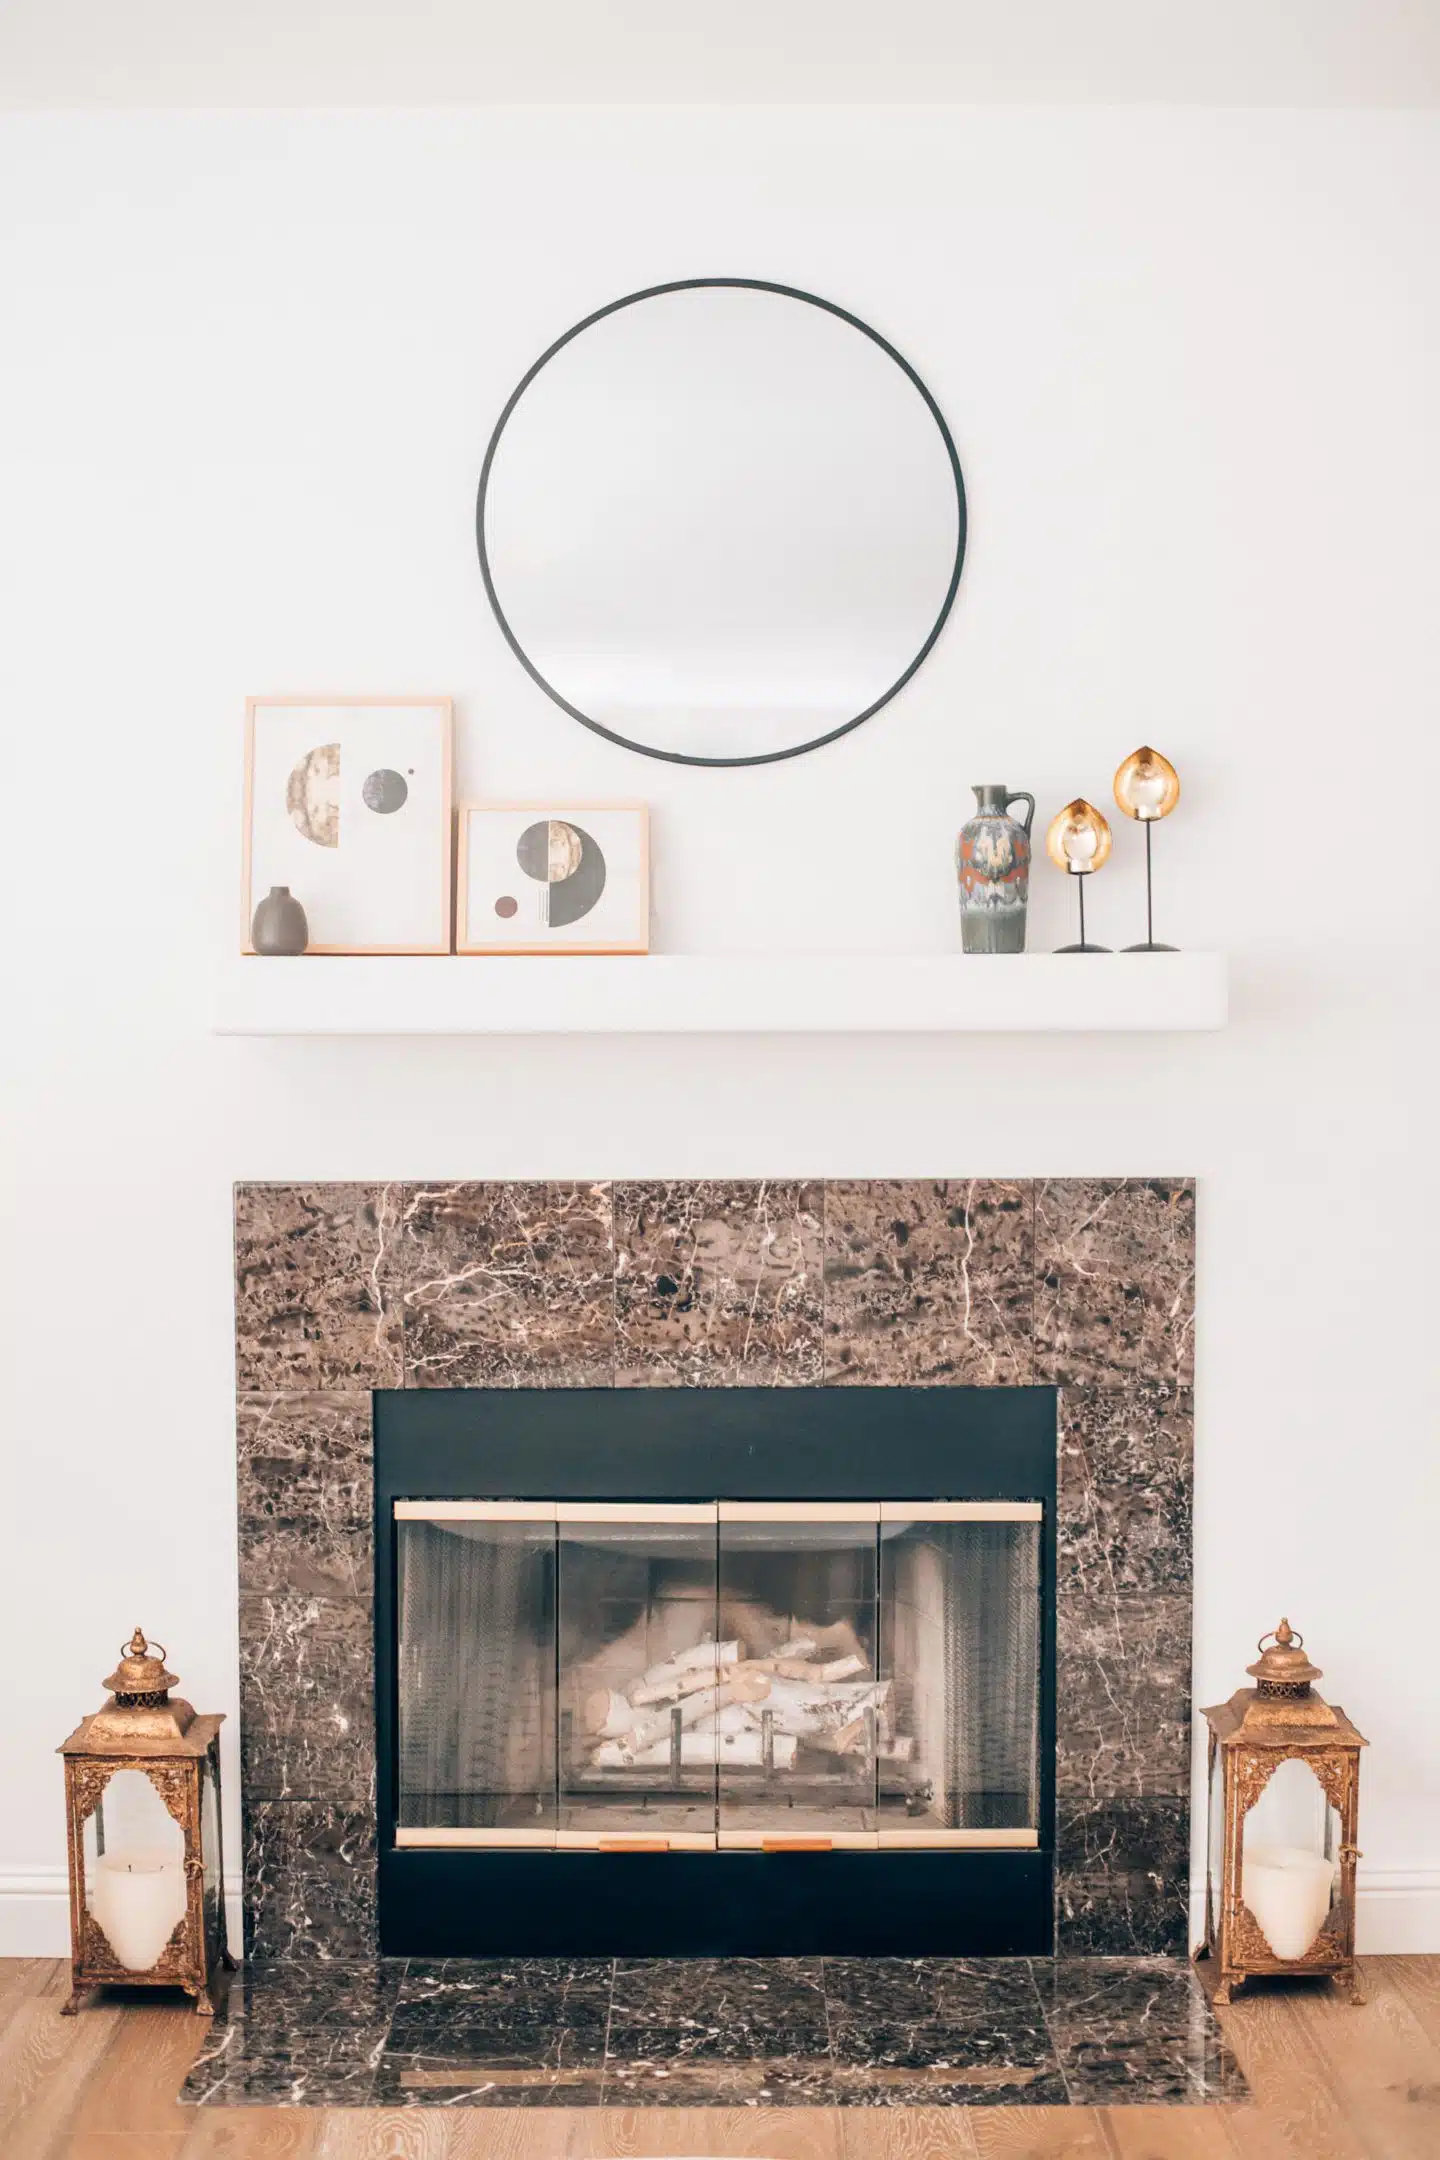
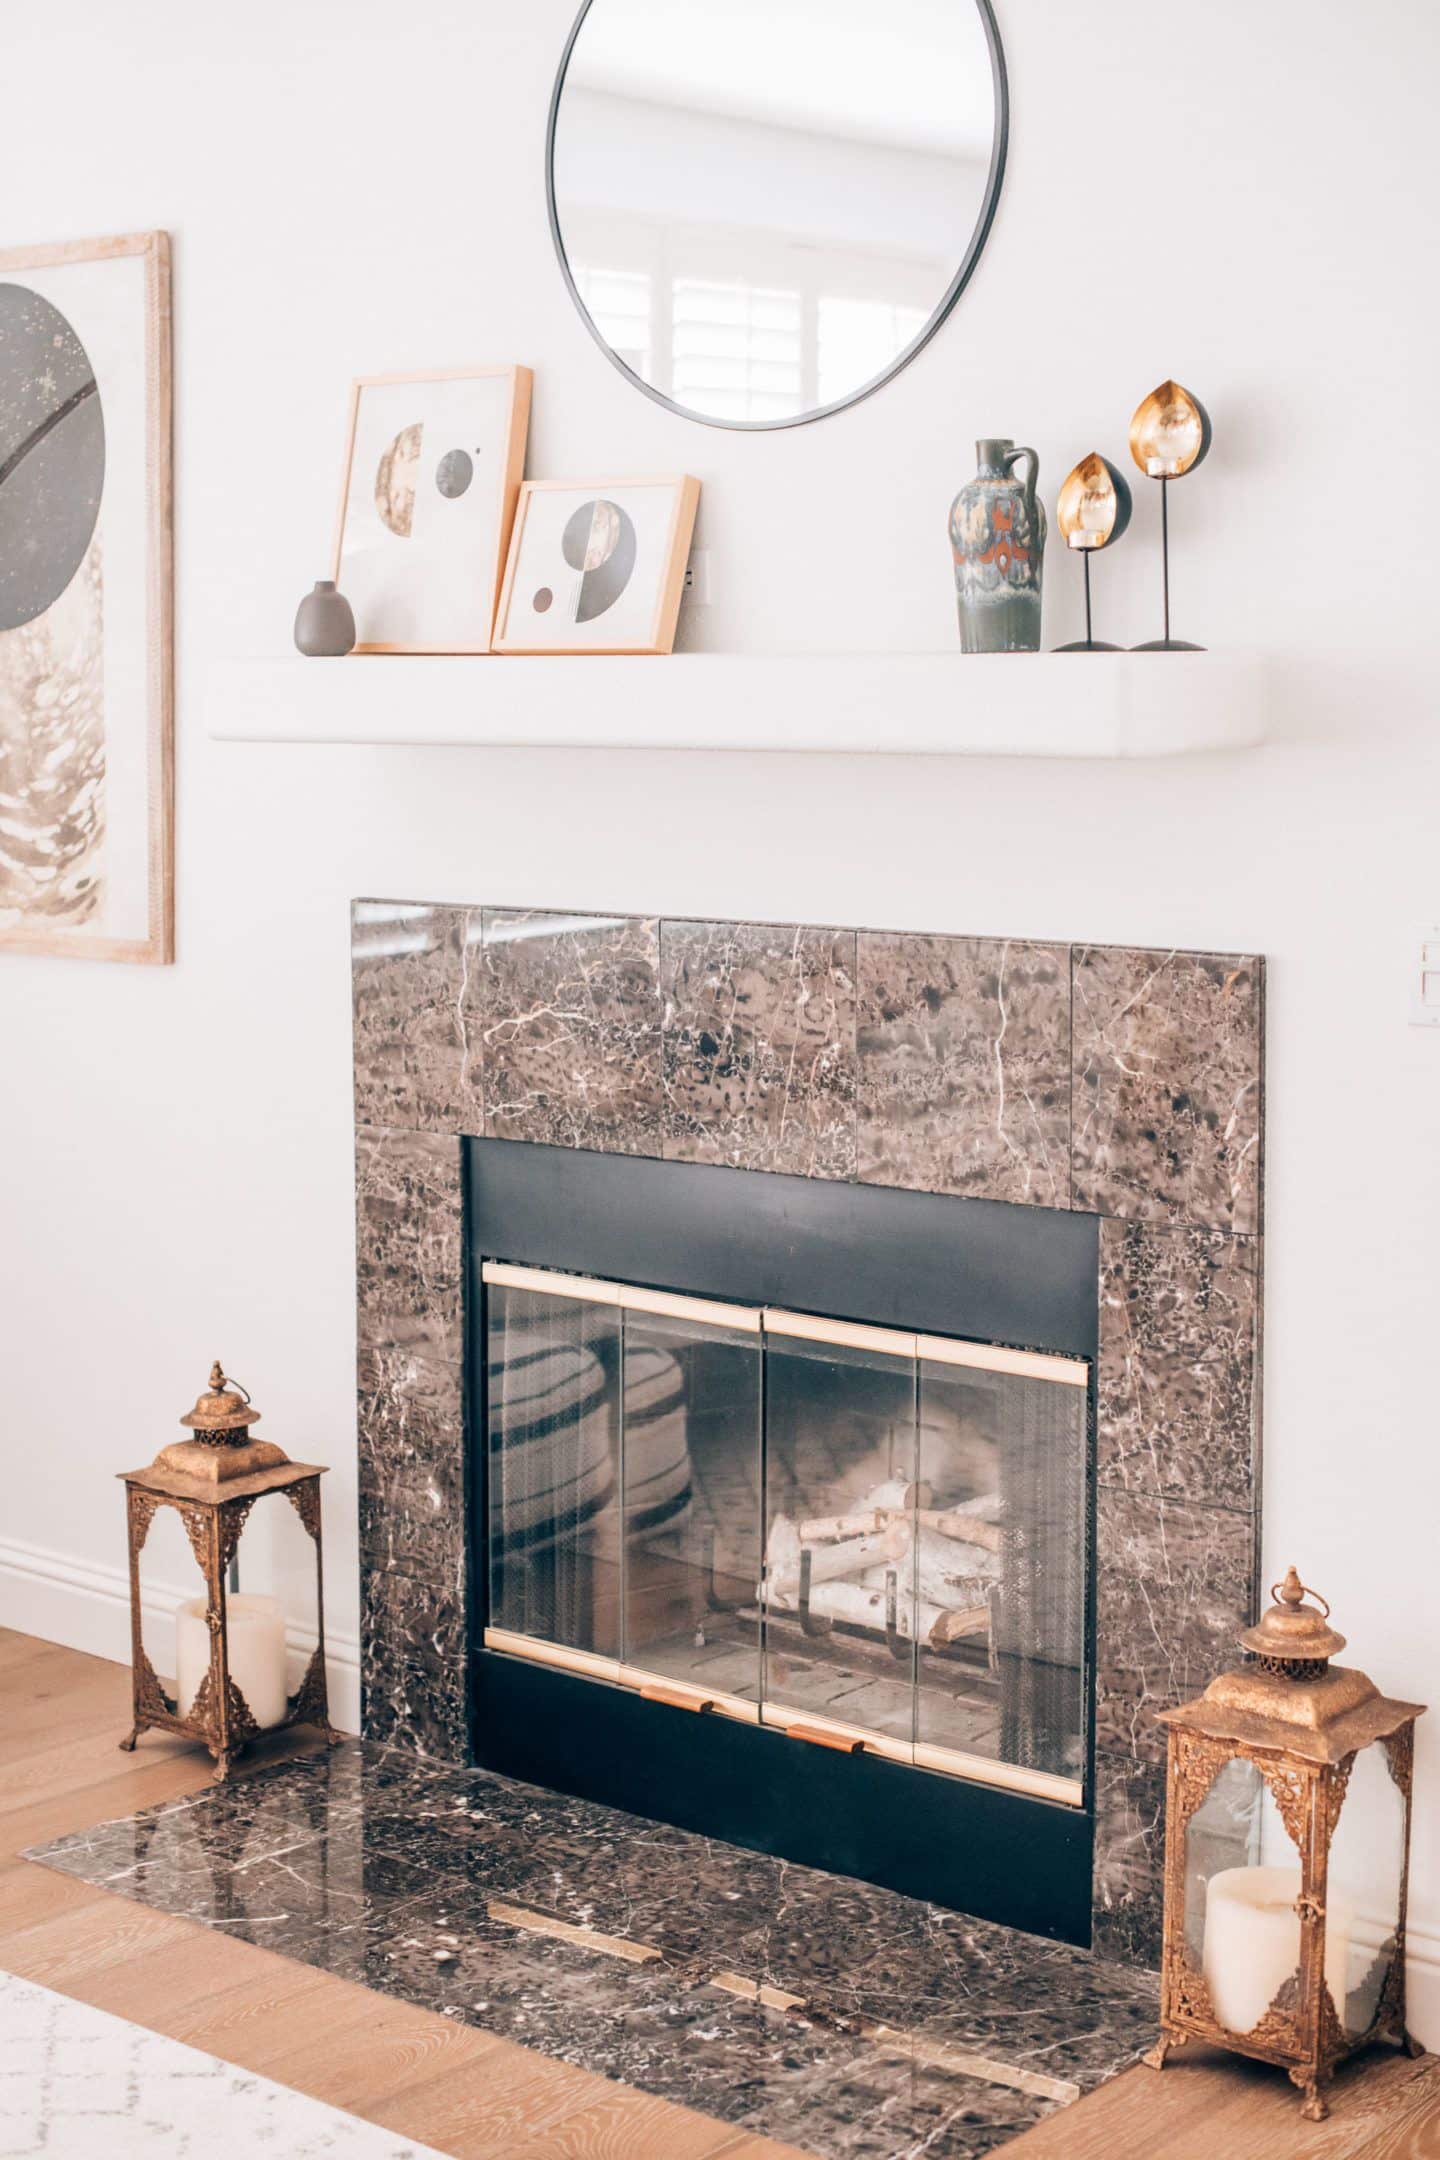
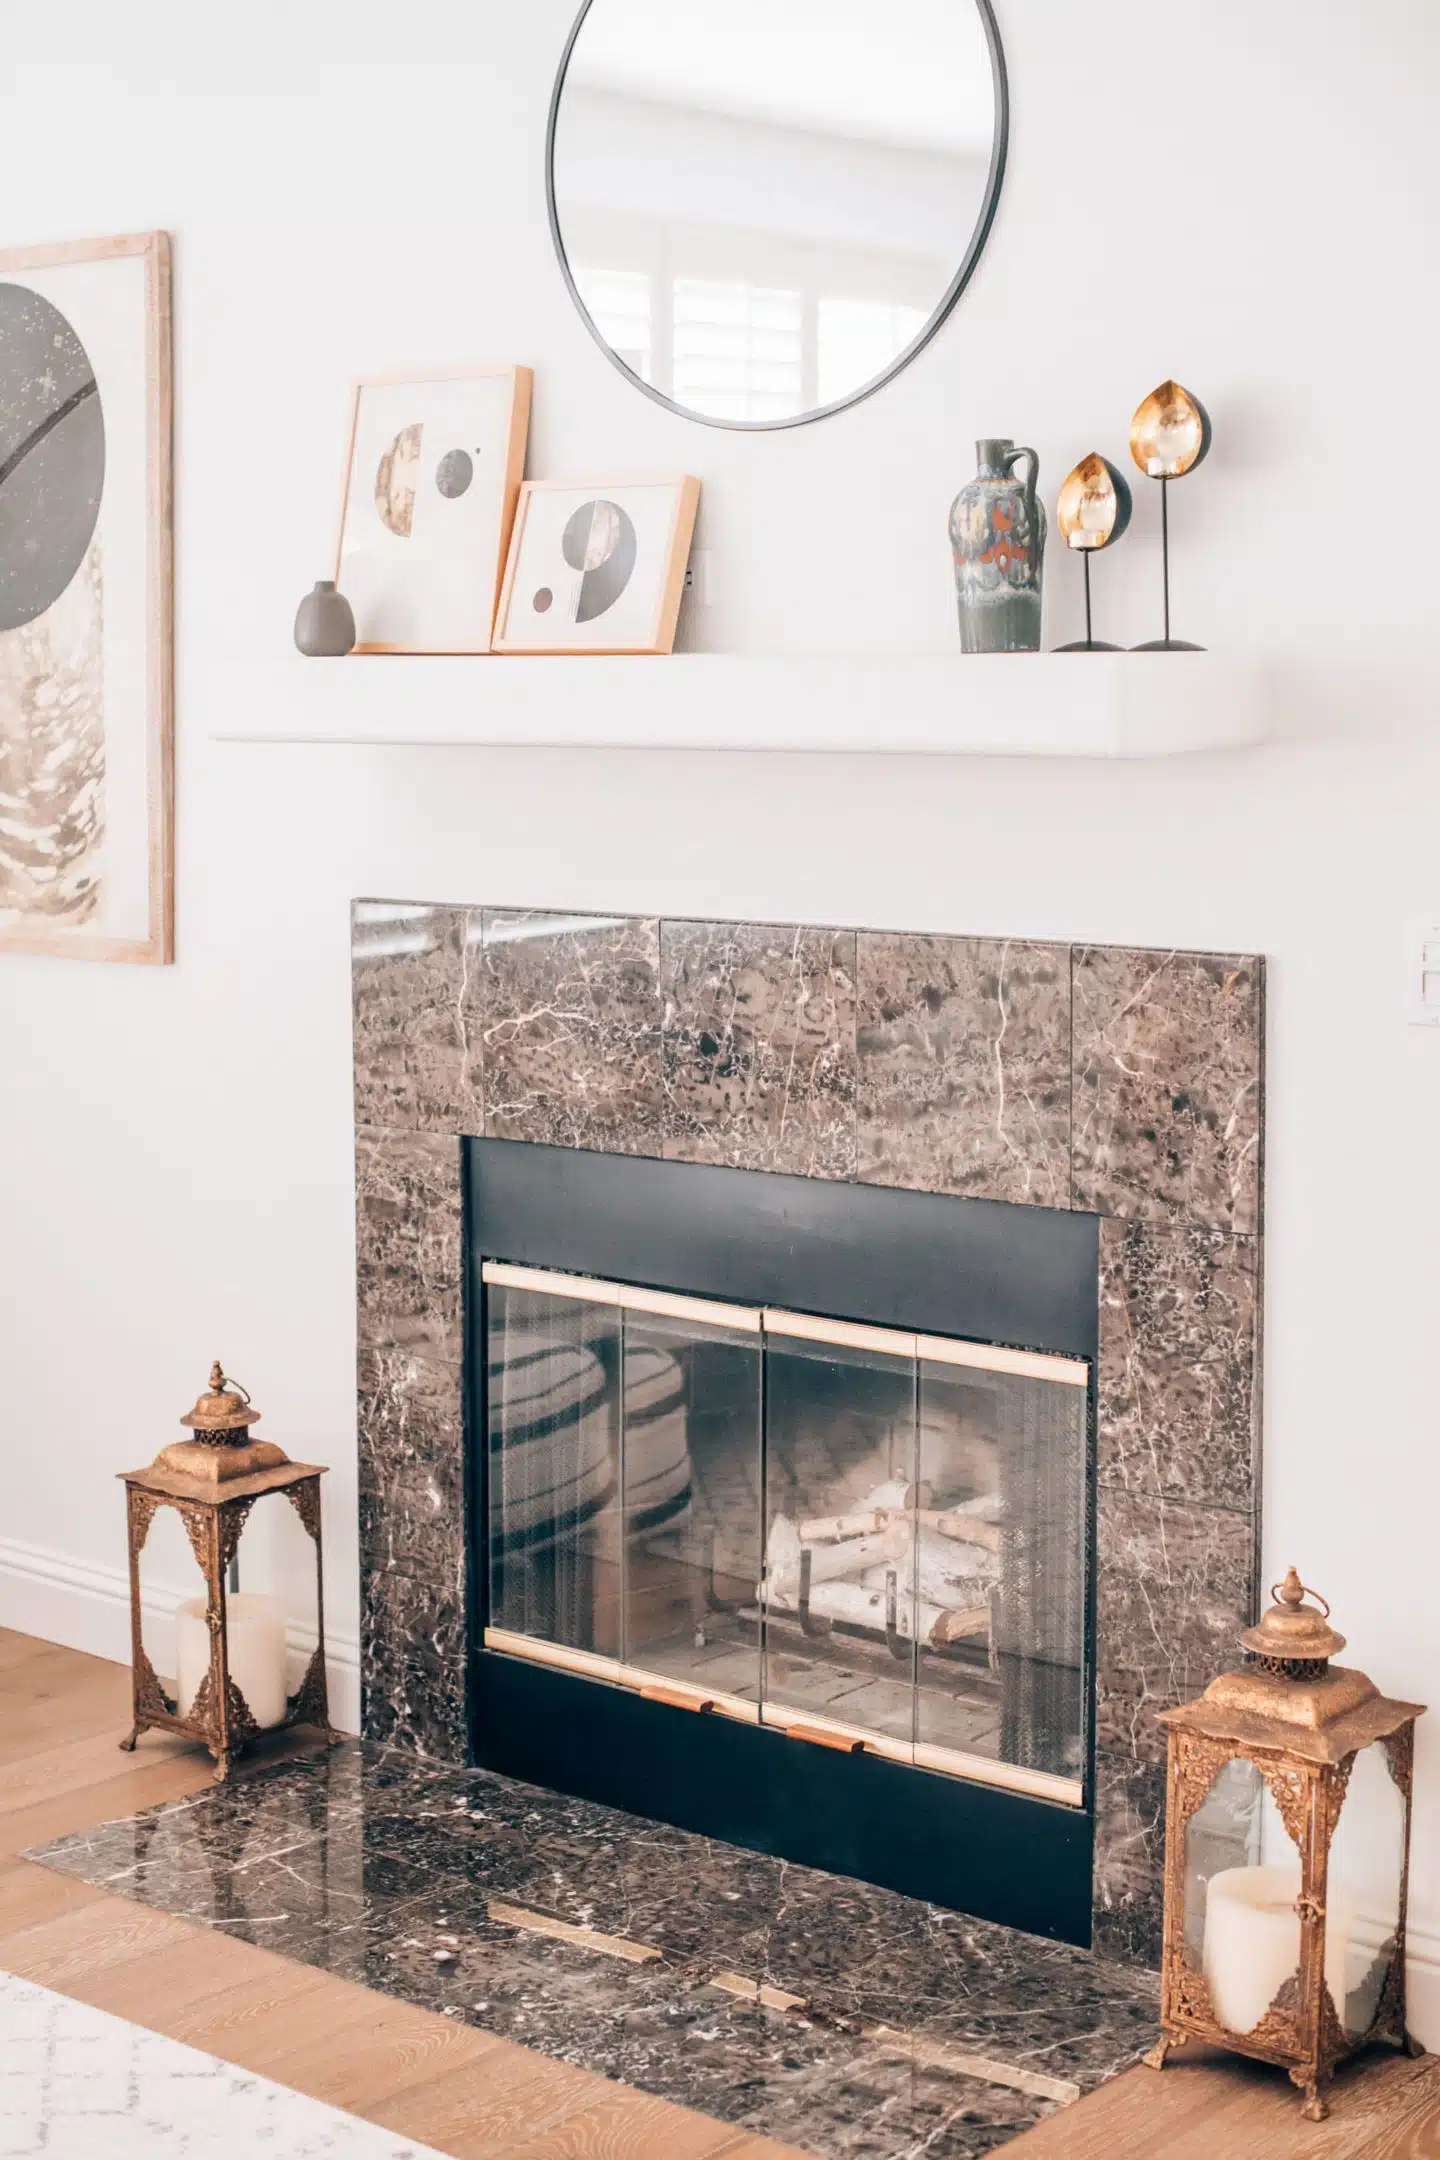
Our house has two fireplaces, one in the living room and one in the family room. The family room fireplace is newer and has a more modern fireplace wall (simple grey tiles that go with the kitchen that it’s located next to). But the living room fireplace is original and the tile was this black marble situation that just wasn’t our style.
We wanted to update the living room fireplace to be lighter, brighter, and to go with our living room’s Scandinavian-Boho (or Scandi-Boho, as I’ve seen it called on Pinterest) style. However, we’re also budgeting for a lot of larger house renovations (that original shag carpet on the second floor has got to go!), and we really didn’t feel like spending a lot of money on redoing the fireplace right now.
We’ve also considered some other DIY projects like refinishing vintage furniture. If you’re interested in restoring furniture, I would recommend checking out this tutorial on how to remove dried Citristrip.


So, I started researching budget-friendly fireplace makeover ideas, and Pinterest really came through for me! Let me introduce you to Fireplace tile decals. You can find so many tile sticker patterns and prints on Etsy, and these vinyl fireplace decals are an inexpensive way to give your fireplace a facelift! Linking a few below.
Shop these tile stickers below:

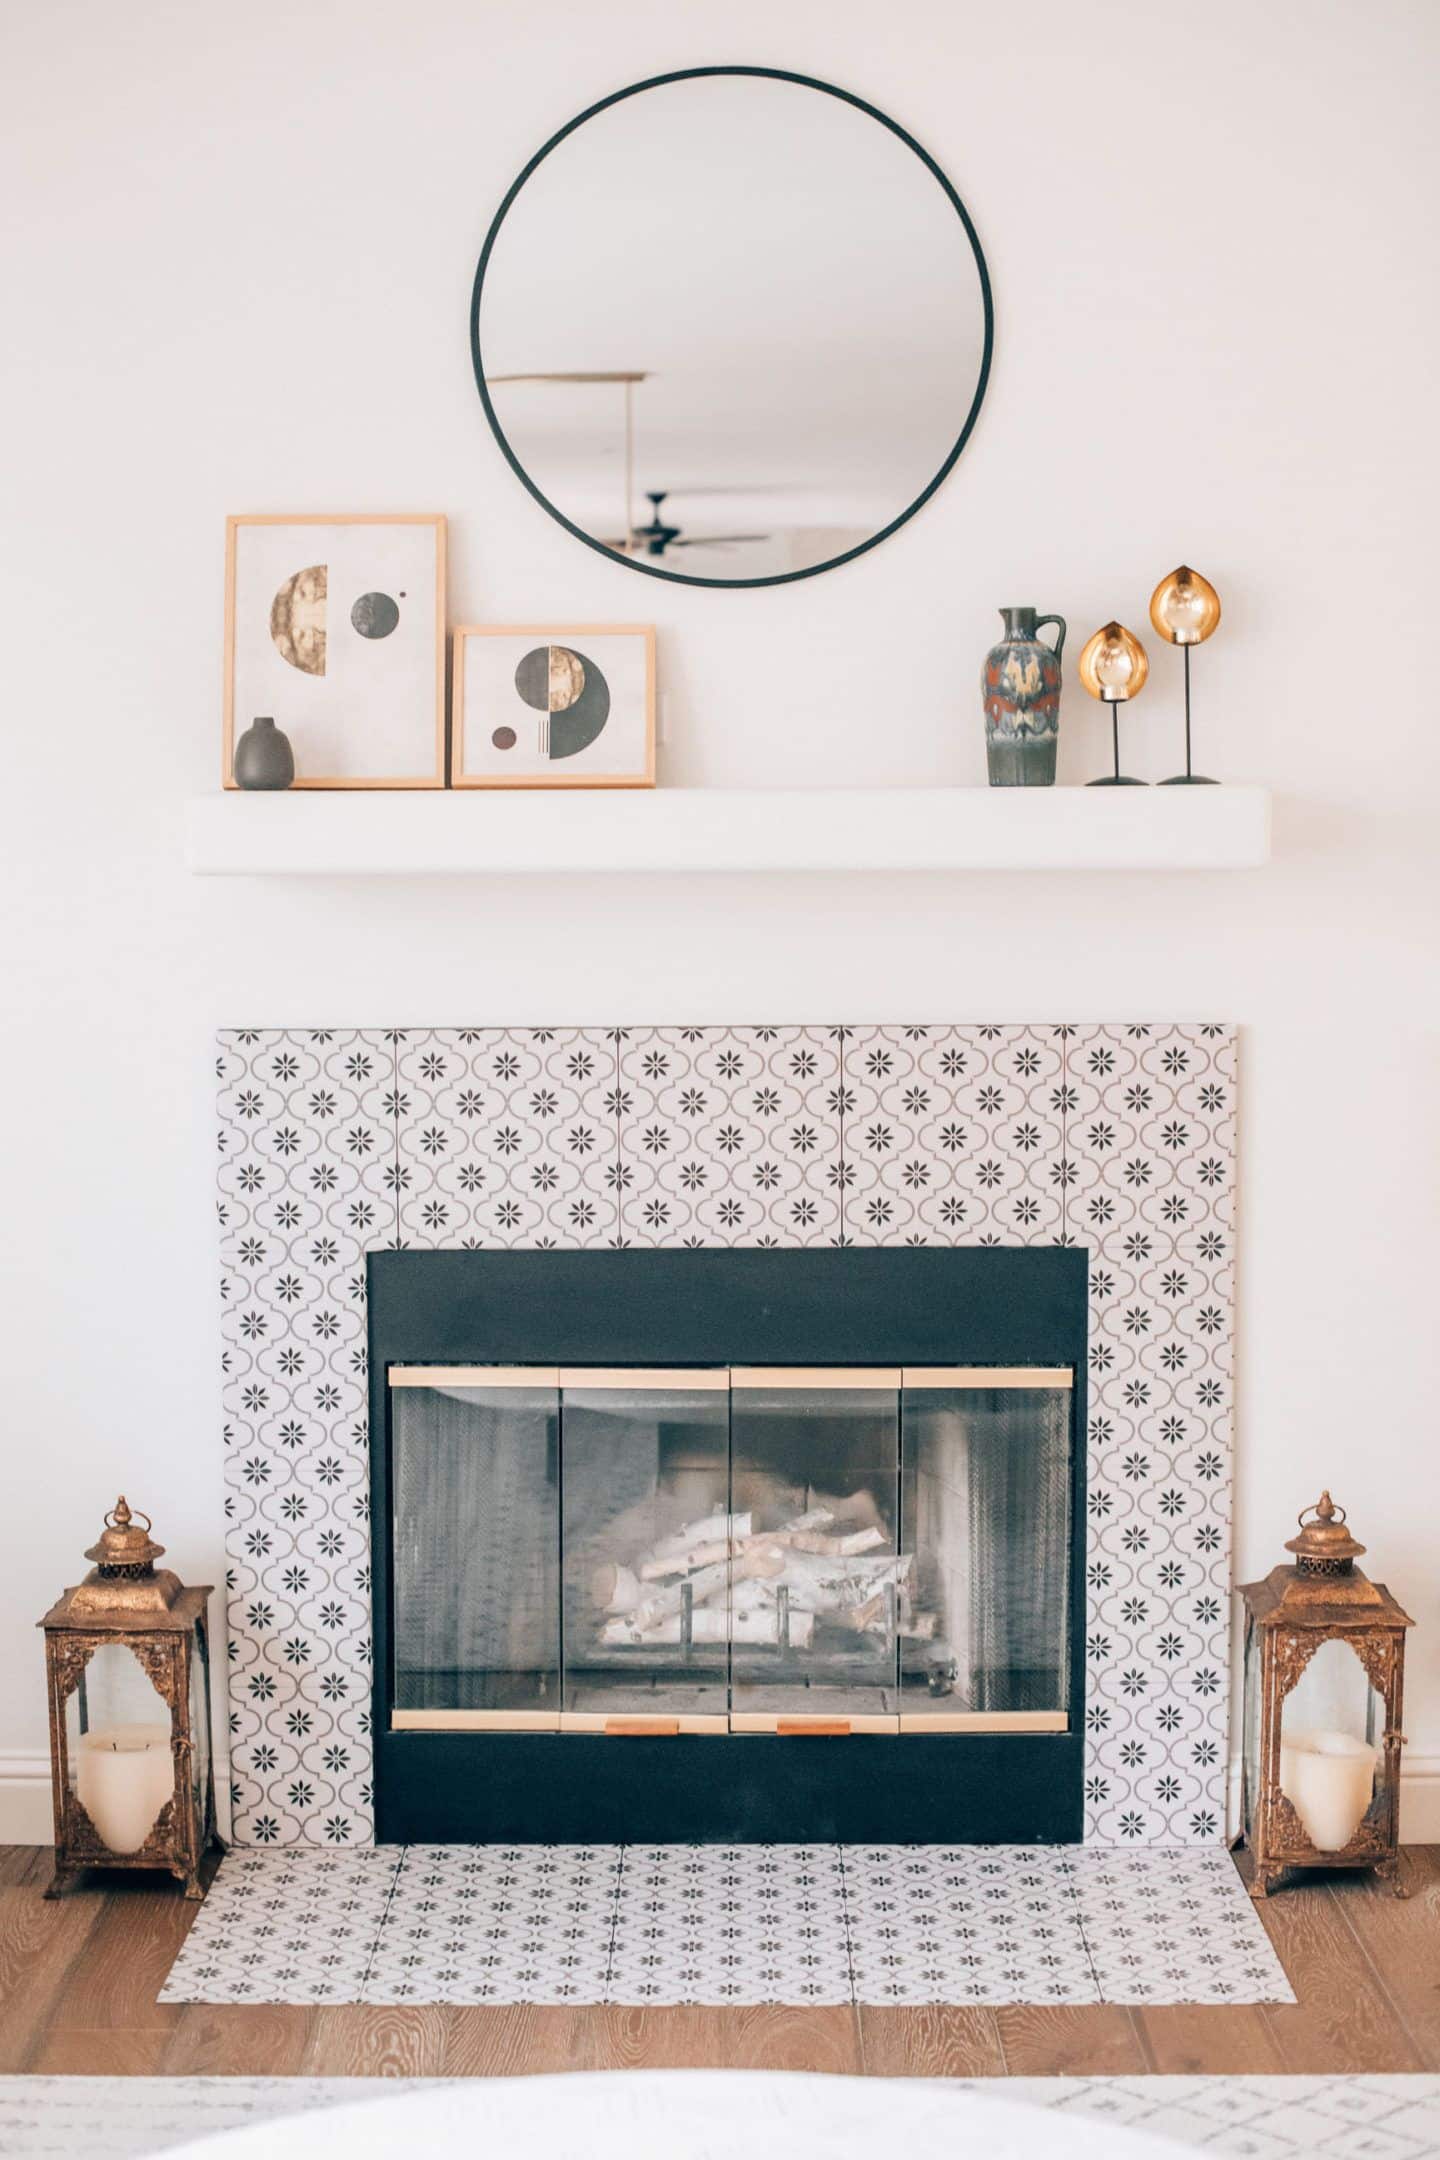
We went with this neutral print, and these fireplace wall decals are the perfect temporary solution for us. While we’d love to tear out the original tile and do a beautiful new Moroccan tile eventually, that’s like phase three of our house renovation budget and might not happen for a few years since we have so many other competing priorities (that are really freaking expensive!!). This way, we don’t have to stare at that ugly black tile in the meantime!
I did also explore painting the tiles with a stencil. I found a really pretty stencil on Etsy and Omied and I followed the instructions on some practice tiles and it just wasn’t working for us. It took a lot of practice to get one 3 x 3 inch pattern looking half-way decent, because as much as we tried to use as little paint as possible, it kept bleeding into other parts of the stencil. And we couldn’t get them to consistently look good, so we scrapped that idea. Here’s some free advice: painting with tile stencils is way harder than it looks—use tile stickers instead!
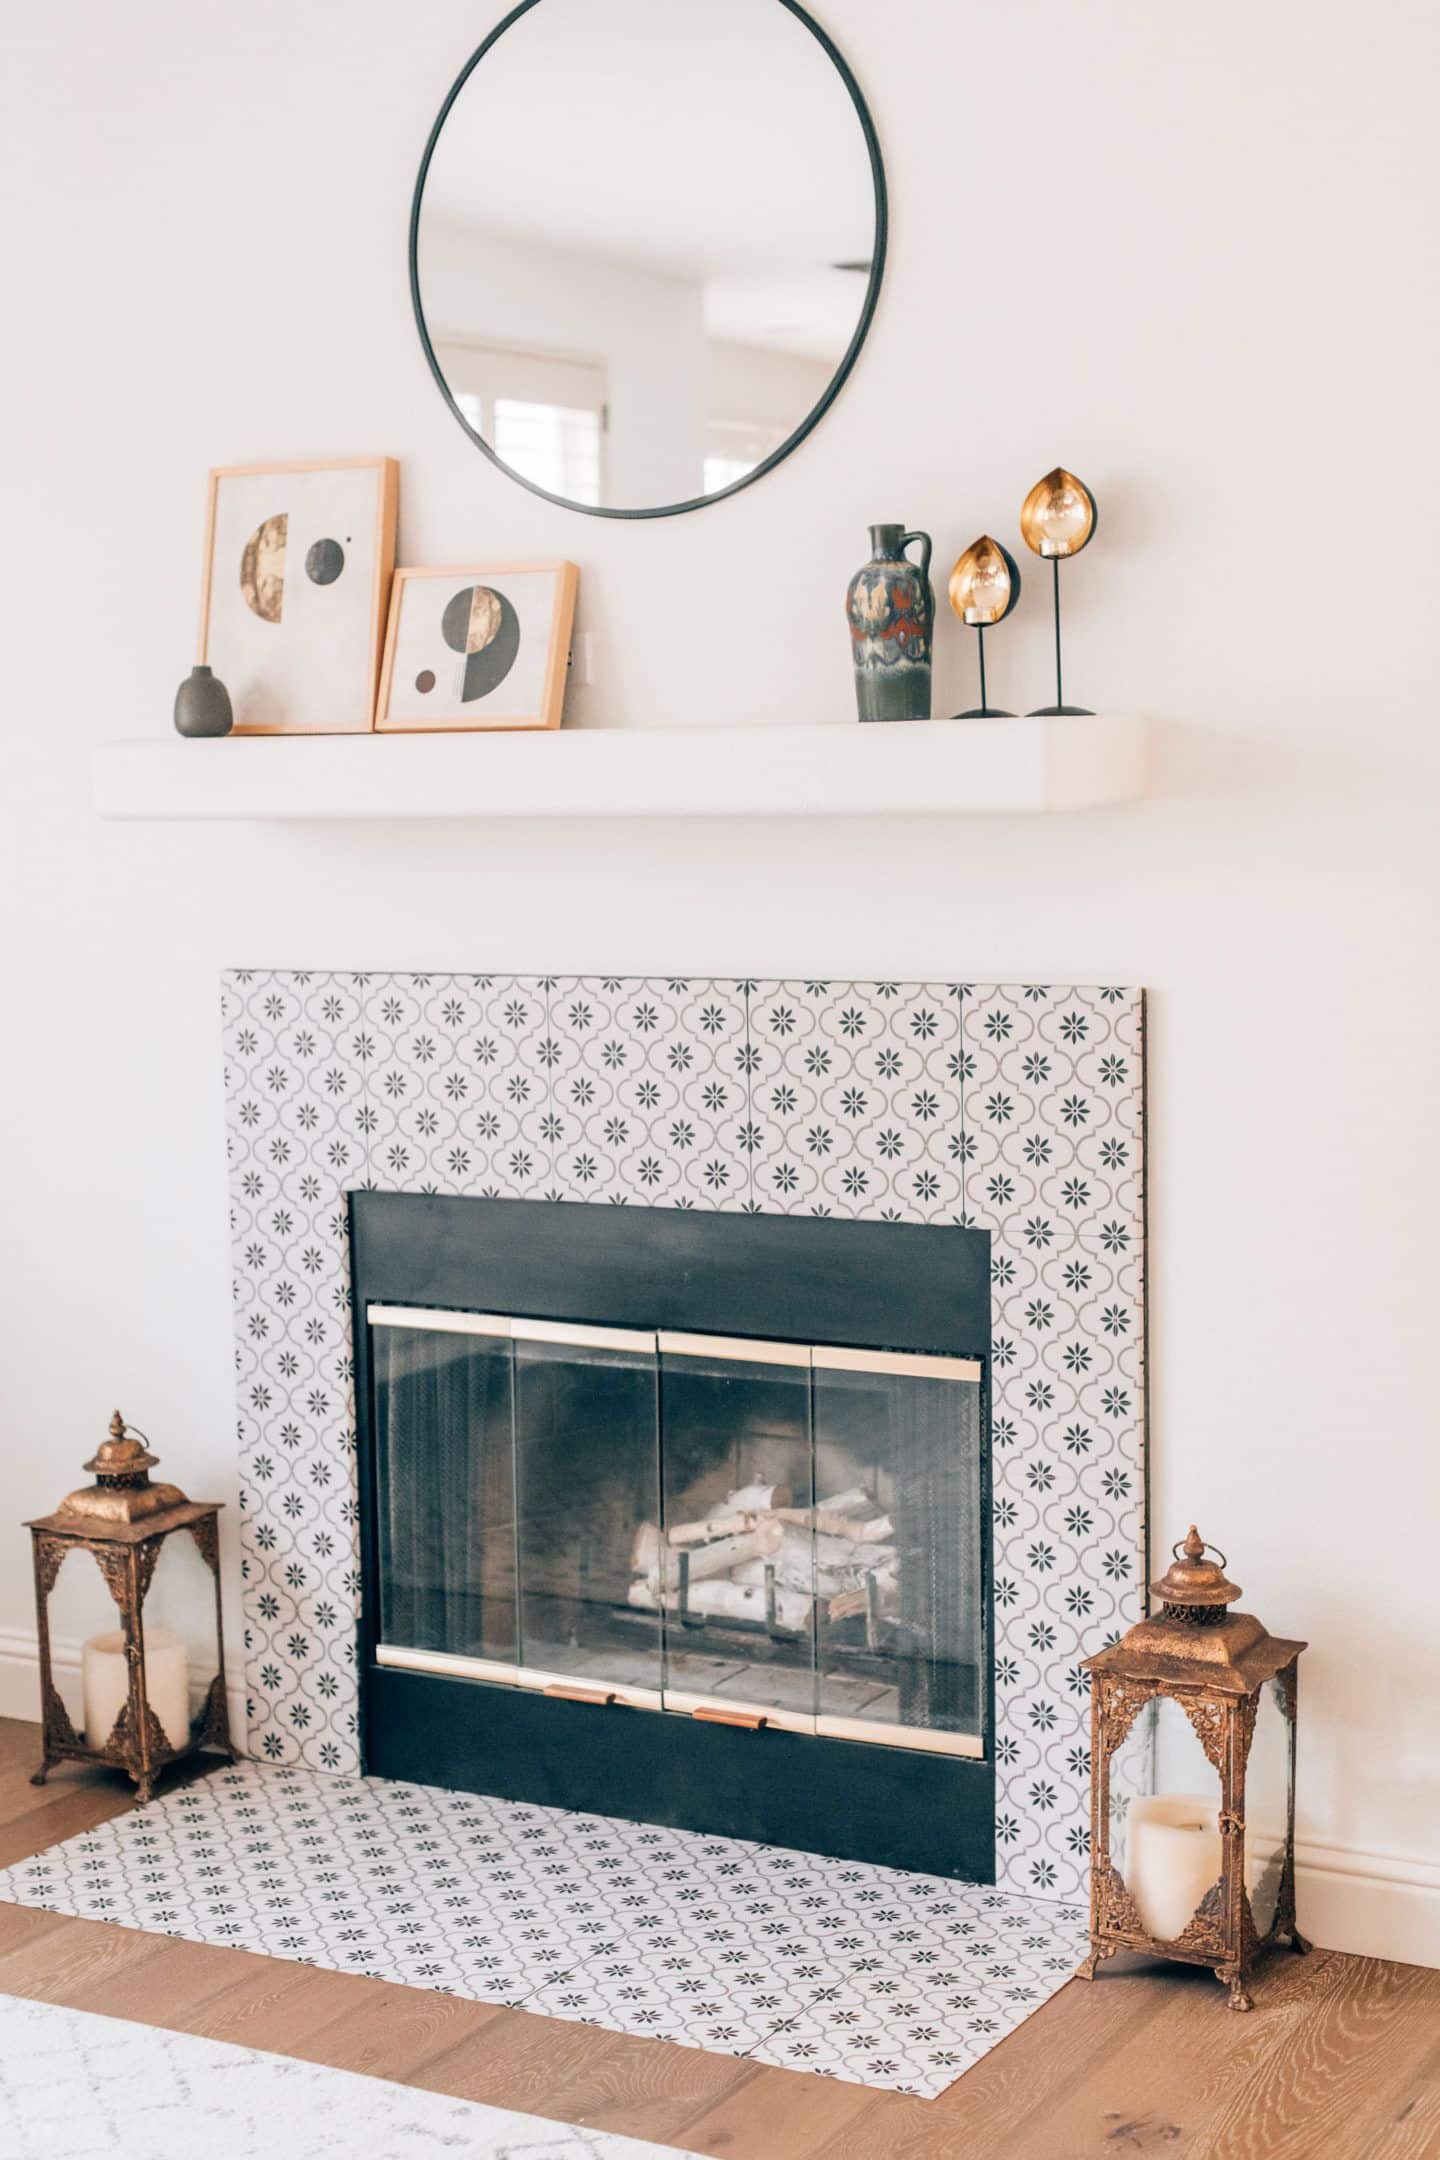

I searched high and low on Etsy for the perfect fireplace wall stickers. If you have a large fireplace or large tiles, you might want to consider having smaller tiles printed onto one larger tile sticker, if that makes sense. I found Hexagon Decor on Etsy and they were able to do this custom order for me. Most of our fireplace tiles are 12 x 12 inches, but we didn’t want each tile sticker to be one large 12 x 12 print. Instead, we had smaller tiles printed 3 by 3 within the 12 inch sticker, with a tiny bit of spacing in between each tile.

If you check out Hexagon Decor’s Etsy shop, you’ll see that they have so many gorgeous options for vinyl fireplace stickers as well as other wall decor like wall murals, and even stair risers. Kinda thinking that could look so fun on our stairs after we redo them and say goodbye to the carpet!
Delivery from Hexagon Decor was pretty quick, esp considering it ships from the UK. They have 4.5 out of 5 stars on Etsy and the quality is on point—we were super happy with it!
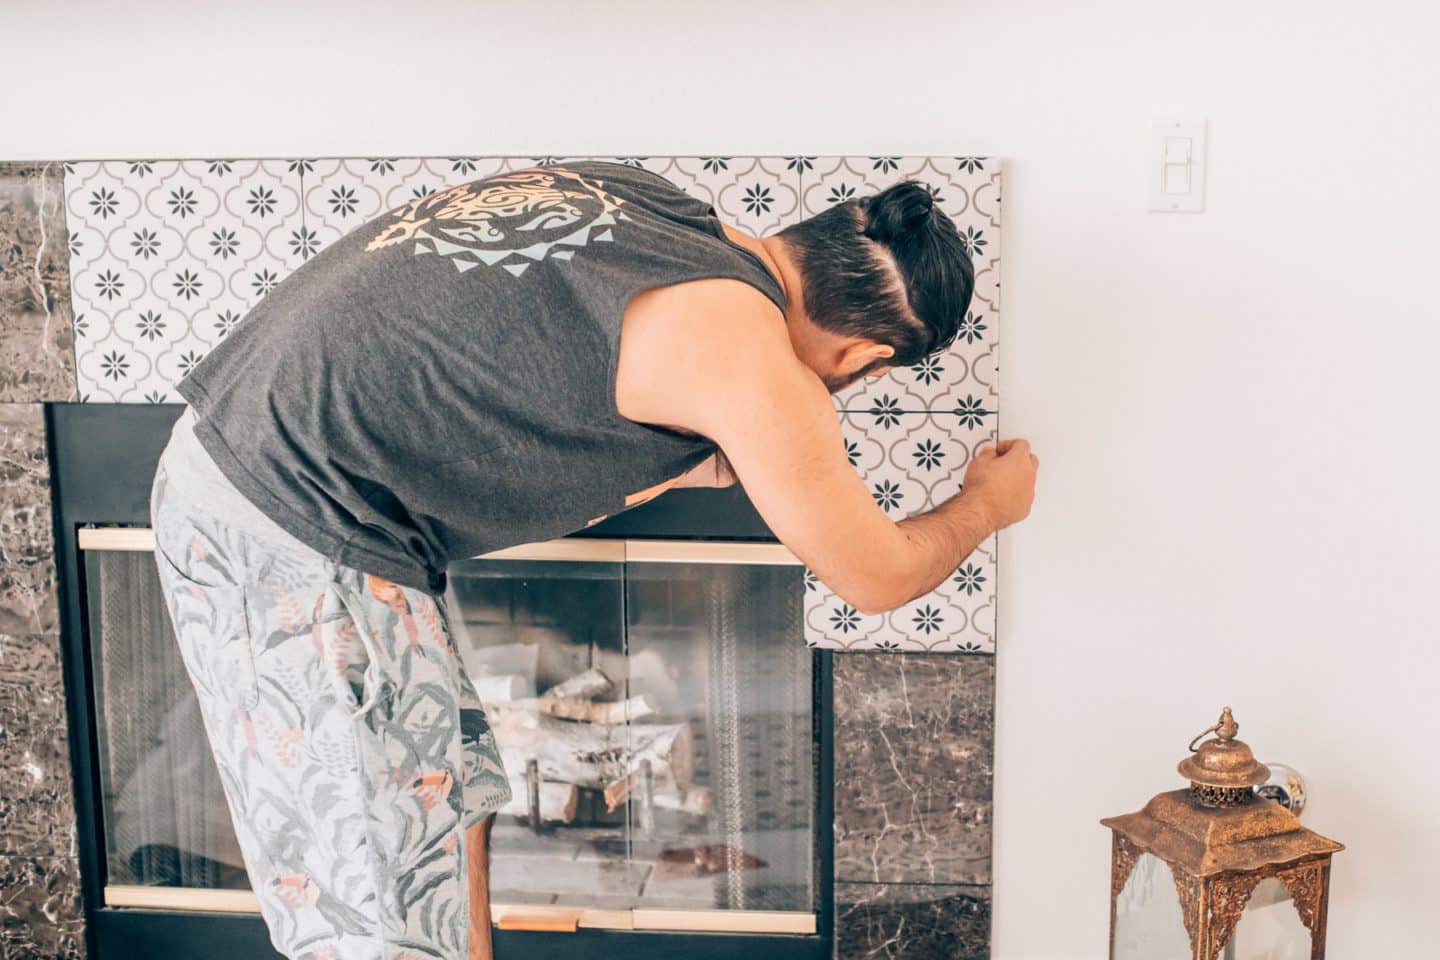

Application was pretty easy, although I do recommend having two people for it to make the smoothing process easier. Here’s how to apply fireplace stickers:
1. Start by cleaning your surface. I sprayed our fireplace with 409 and wiped it down, and then I used a dusting rag on it. You want to make sure the surface is as clean as possible and doesn’t have any dust on it, as this can create air bubbles when you place the tile sticker.
2. Pick one fireplace tile to start with. Hexagon Decor’s fireplace stickers were pre-cut which made it super easy. Some of our fireplace tiles around the edges are smaller than the rest of the 12 x 12-inch tiles, so we did those last and measured and cut the tile stickers down to the right size.

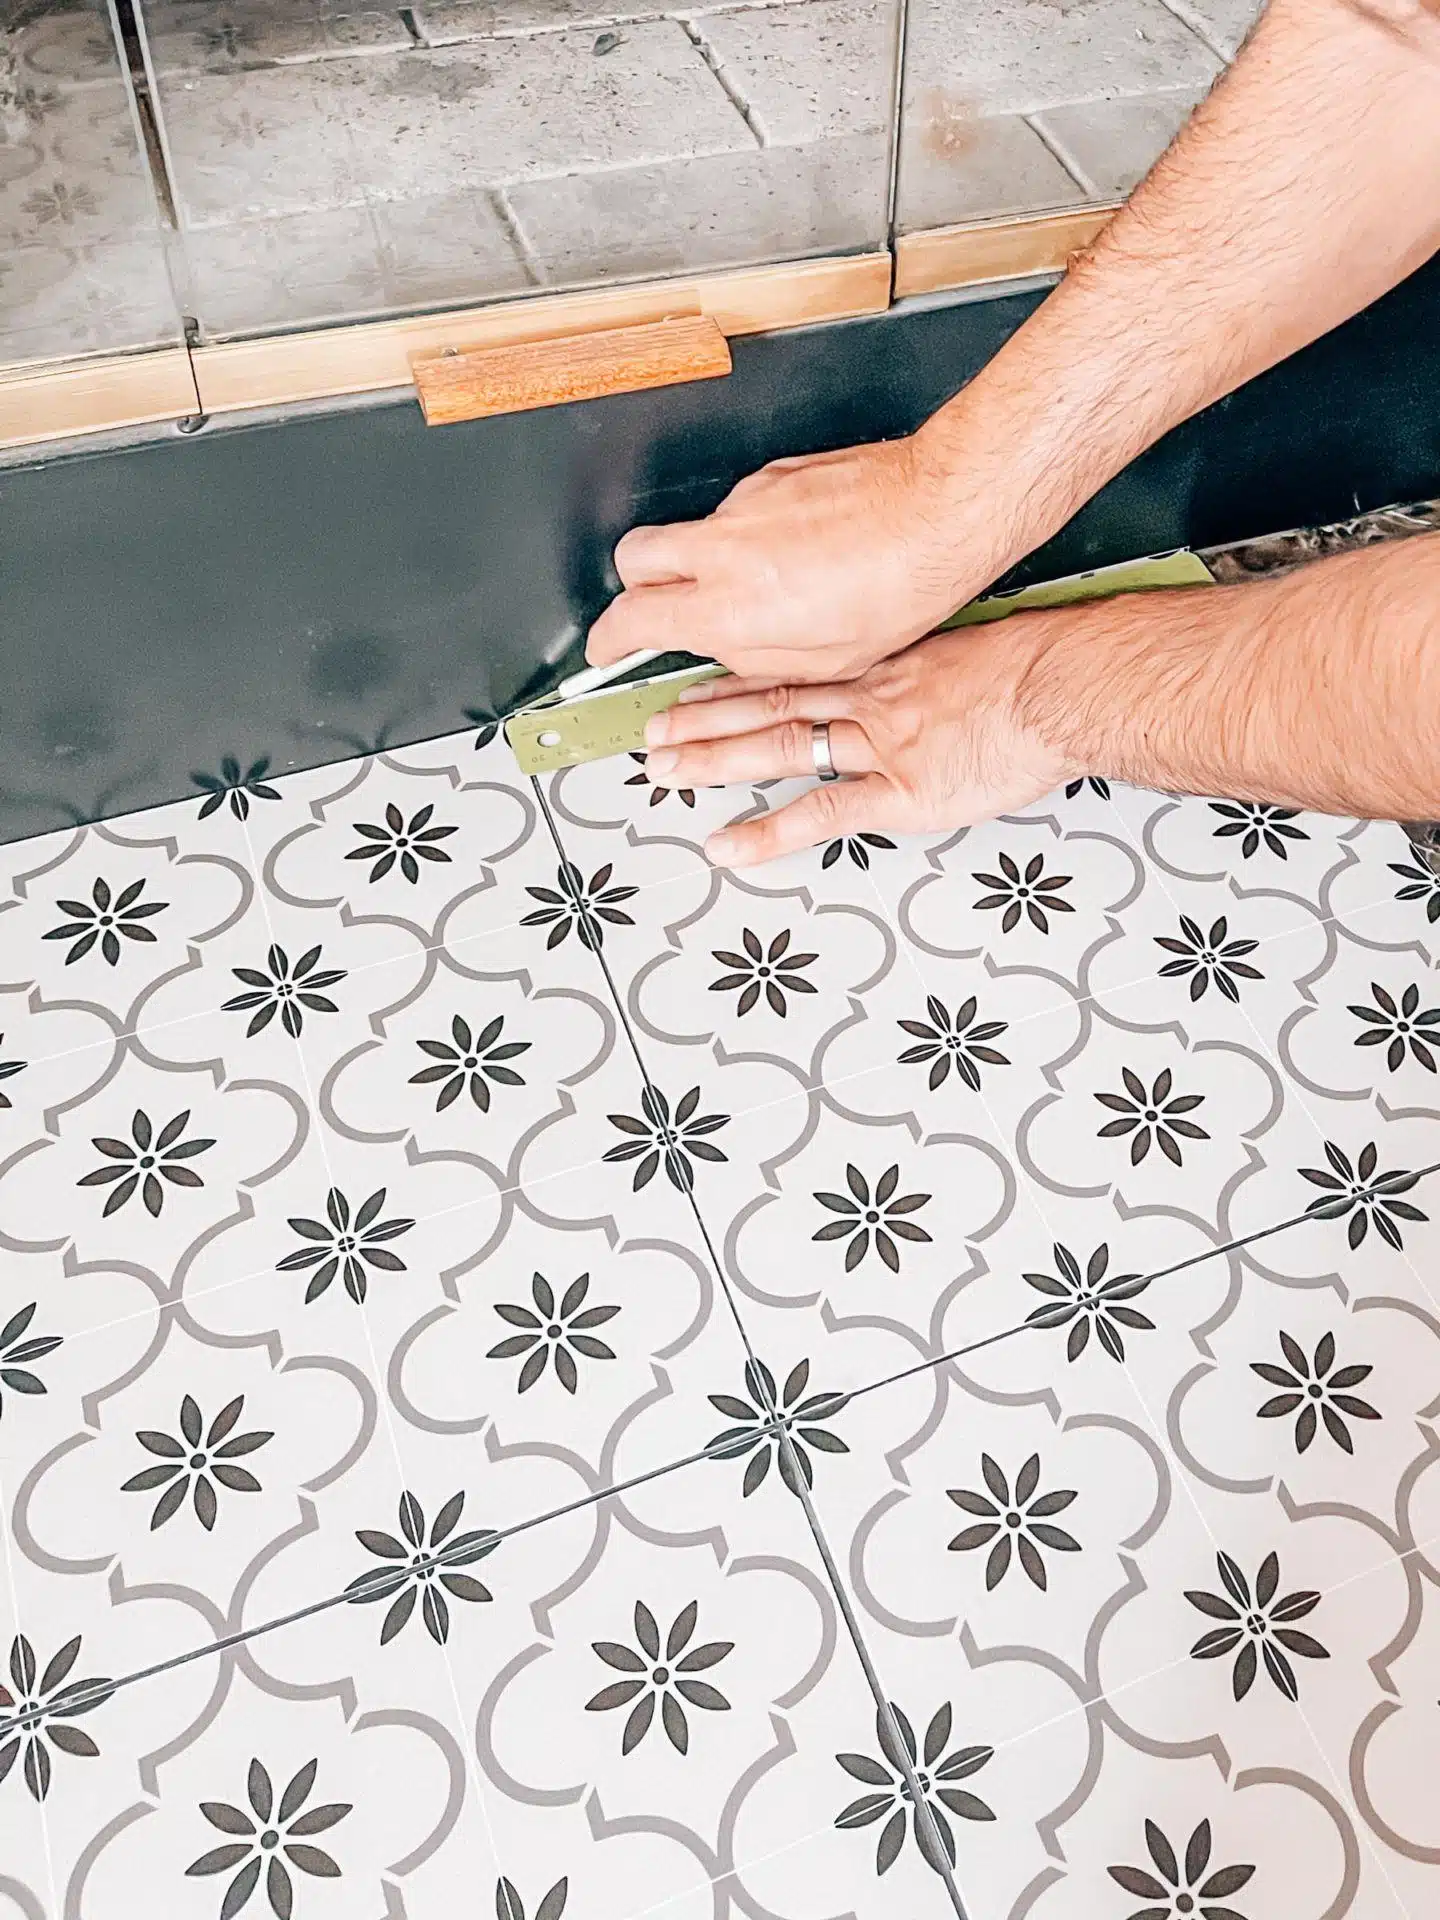
3. Line the fireplace sticker up with your fireplace tile. Omied and I would start at the bottom of the tile and he took a wallpaper smoothing tool to gently smooth all the way up until the whole sticker was placed. This worked really well for preventing air bubbles in the sticker. If you do get any bubbles, just peel the sticker back as far as you need so the bubble is gone and start again. The vinyl stickers are very durable and they were surprisingly forgiving—there were a couple that we felt were slightly misaligned so we peeled the whole sticker off and redid it, and the adhesion and everything still worked great.

4. Continue with the next tile and line up the next tile sticker so that the print matches as perfectly as possible. For our fireplace, we noticed that the grout lines were actually a little bit imperfect, so we just did our best here. Even if the pattern lines of the fireplace stickers didn’t match up 100% perfectly due to the slight misalignment of the actual fireplace tiles, we found that when you take a step back and look at the fireplace as a whole you can’t tell at all.
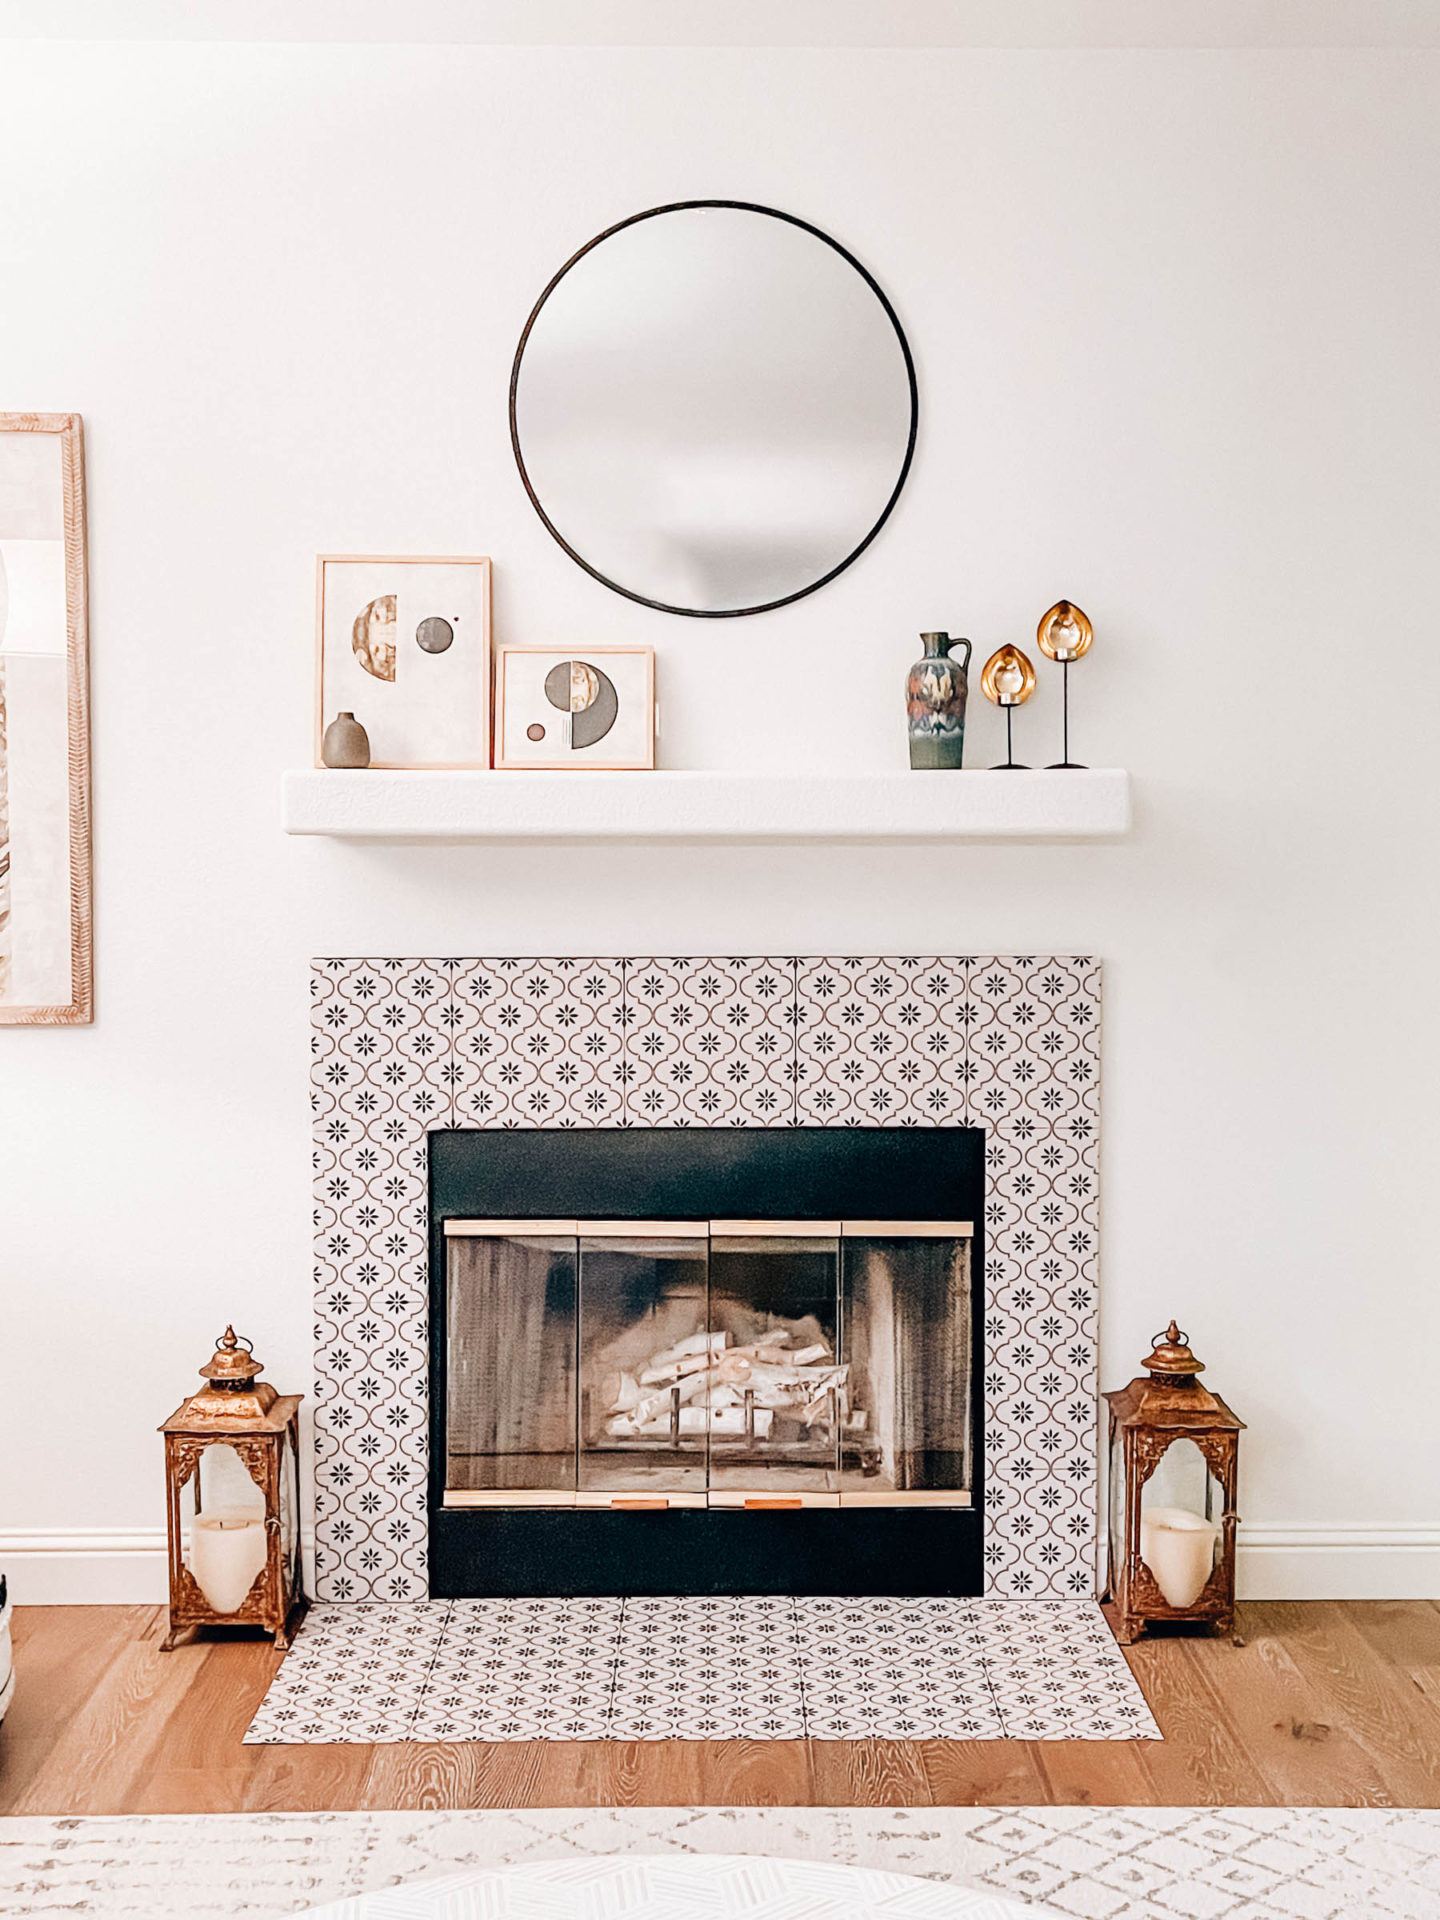
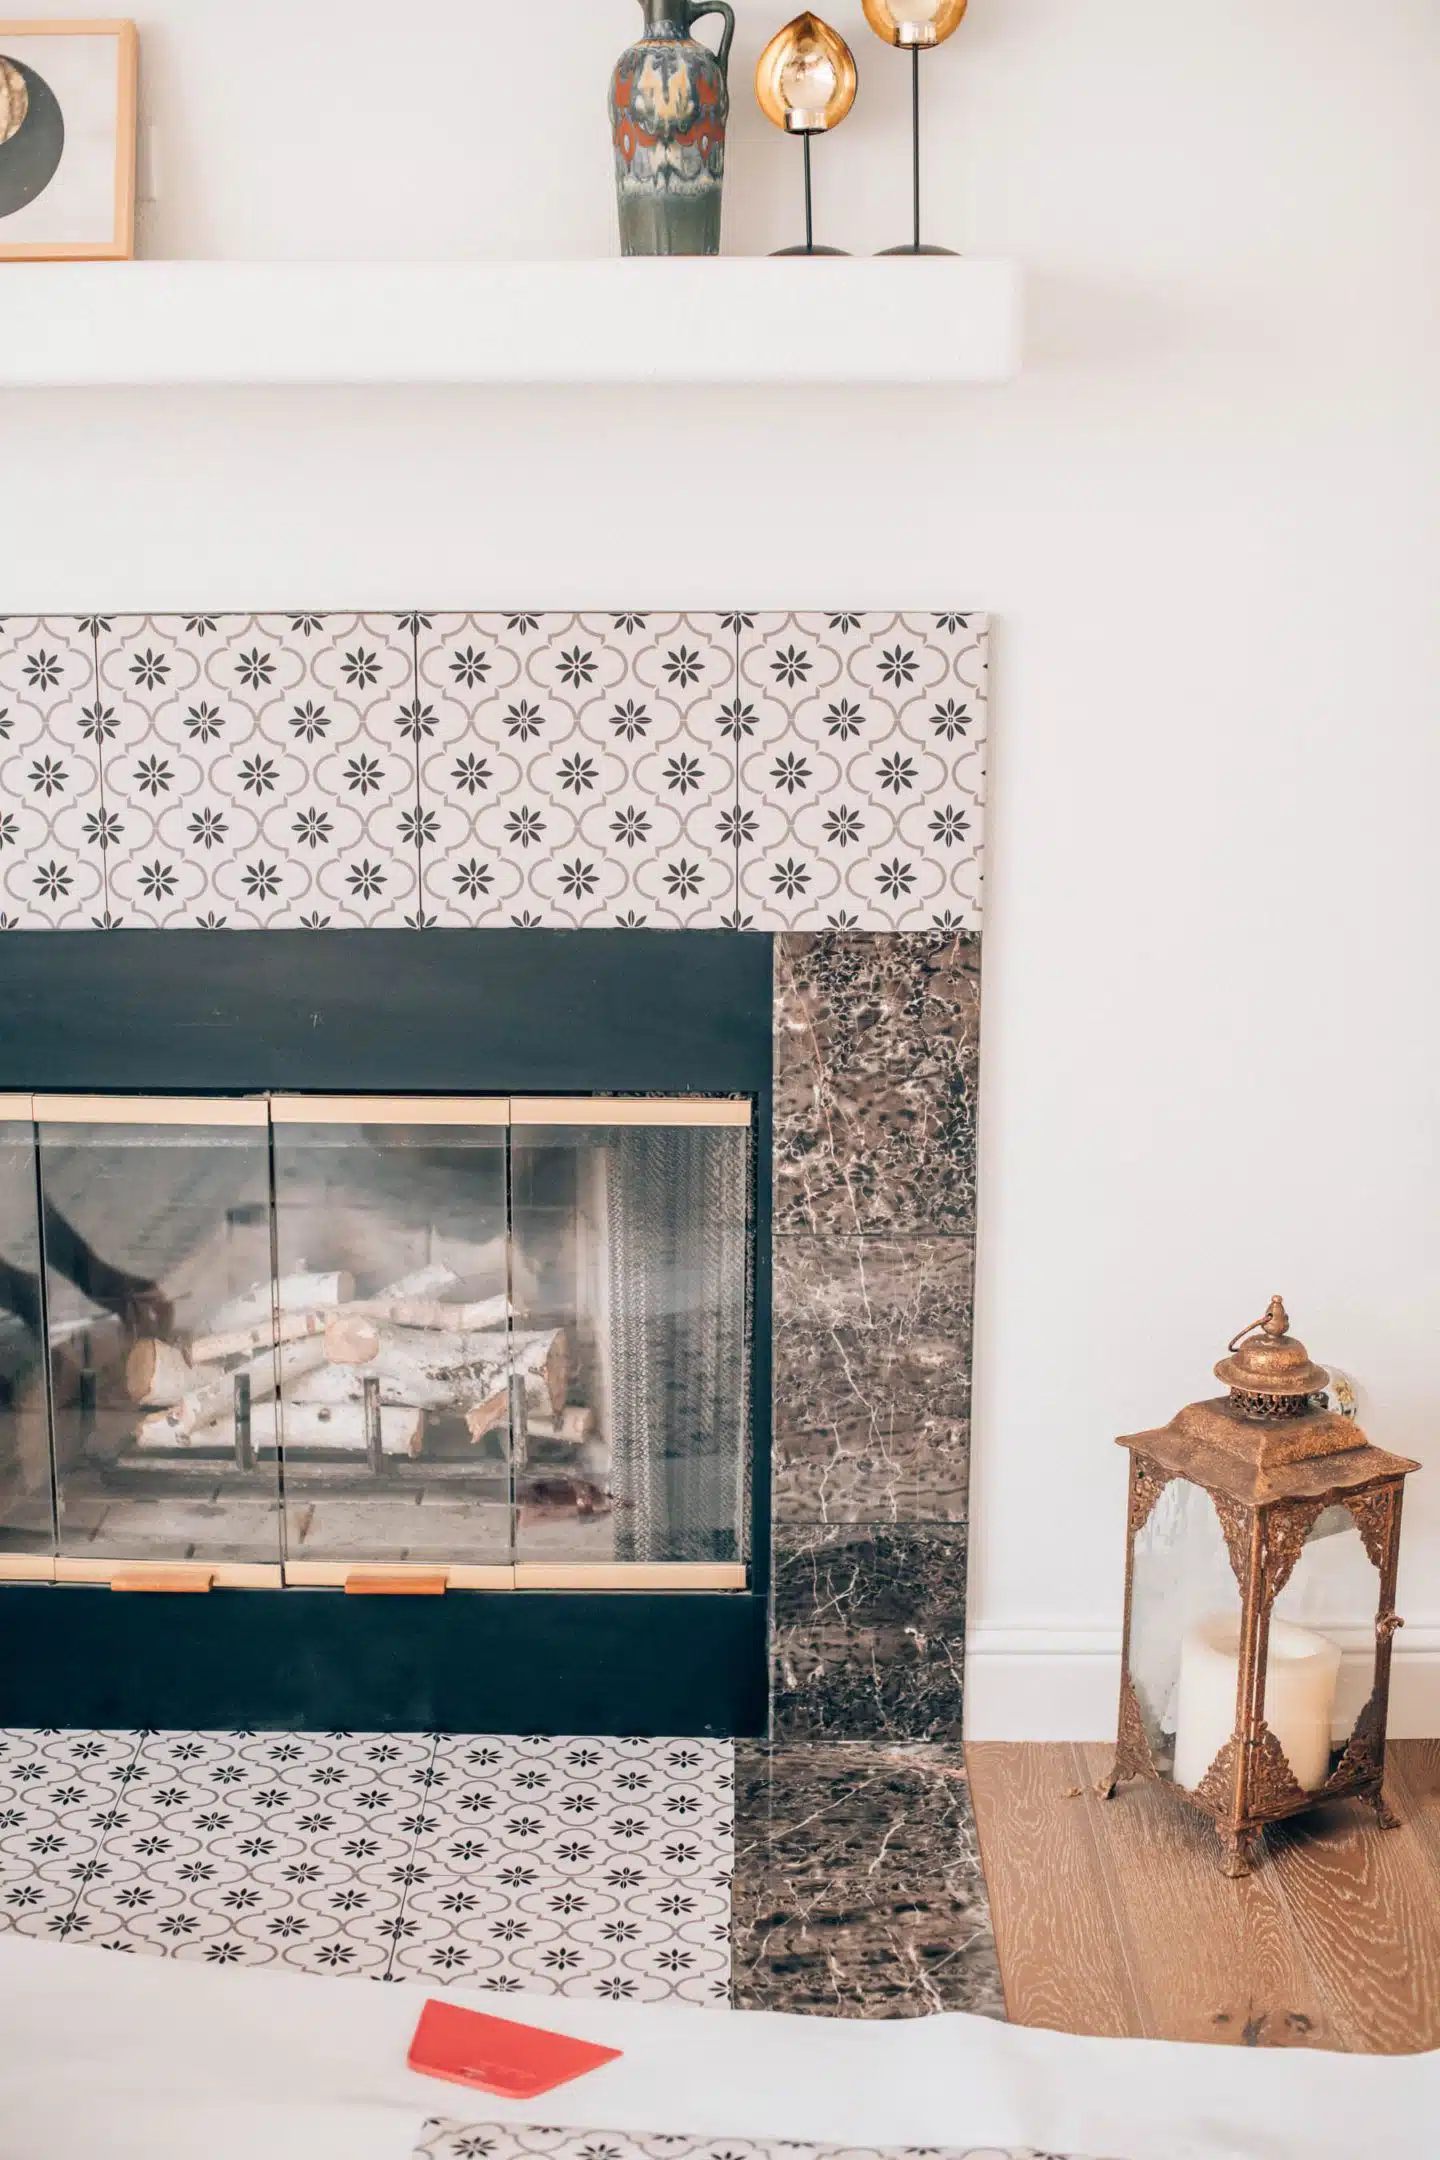
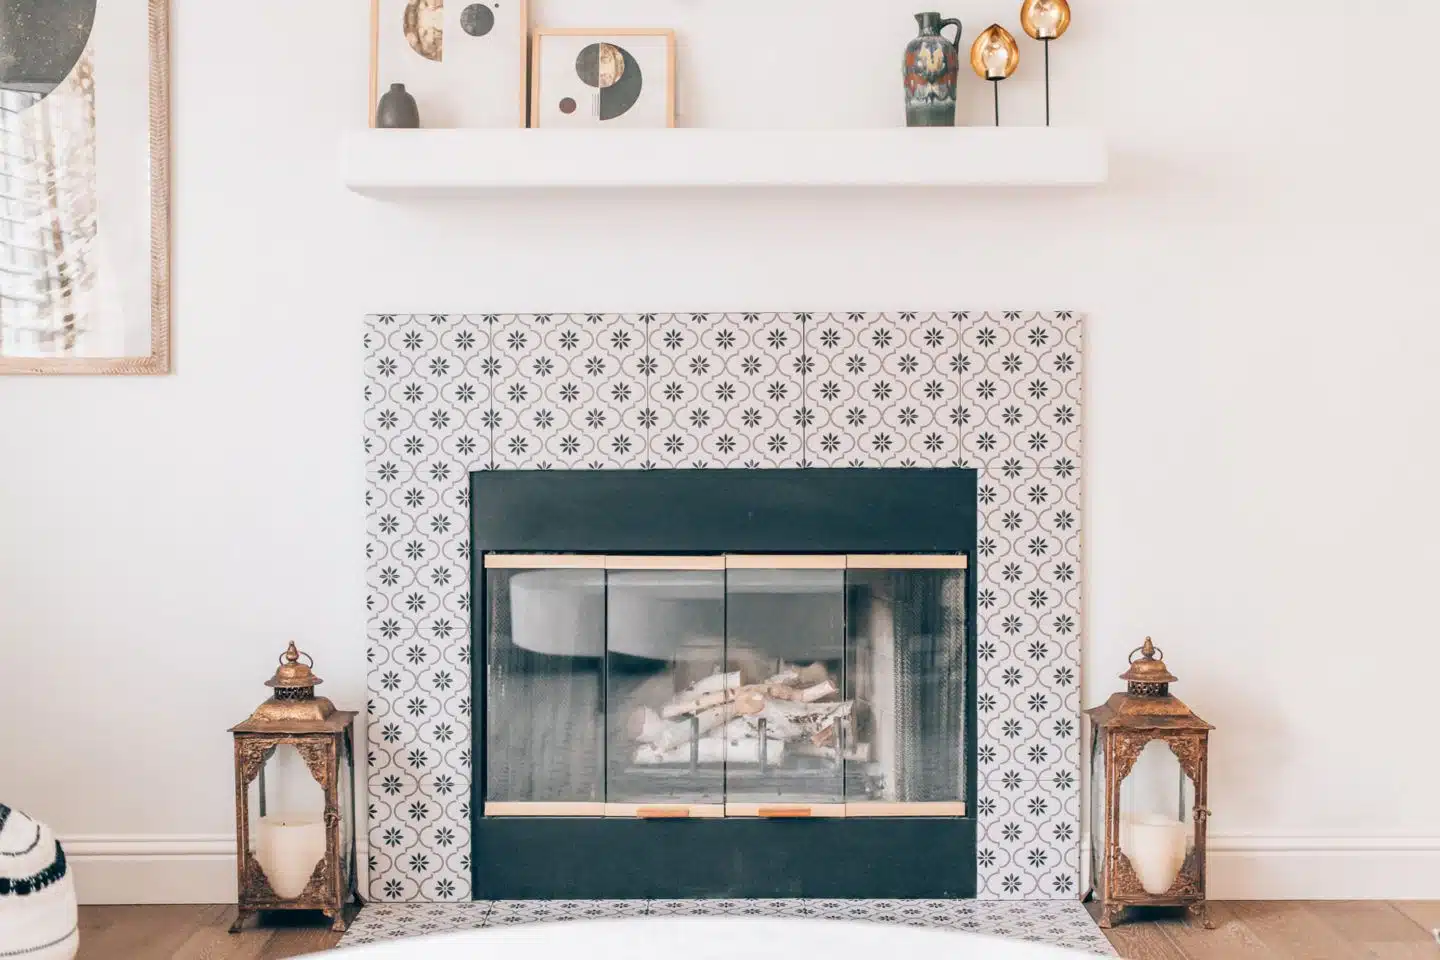
We are so happy with how our fireplace makeover turned out with these fireplace stickers!! It looks so much better and it’s so much more our style.

Omied also wants to get some thin wooden trim that we can paint white and place around the outside of the tiles to frame the fireplace. That way you won’t be able to see how the edges of the tile are black, while the surface is light grey. But that sounds like an Omied project because tbh, it doesn’t bother me at all and I hardly think it’s noticeable! 🙂
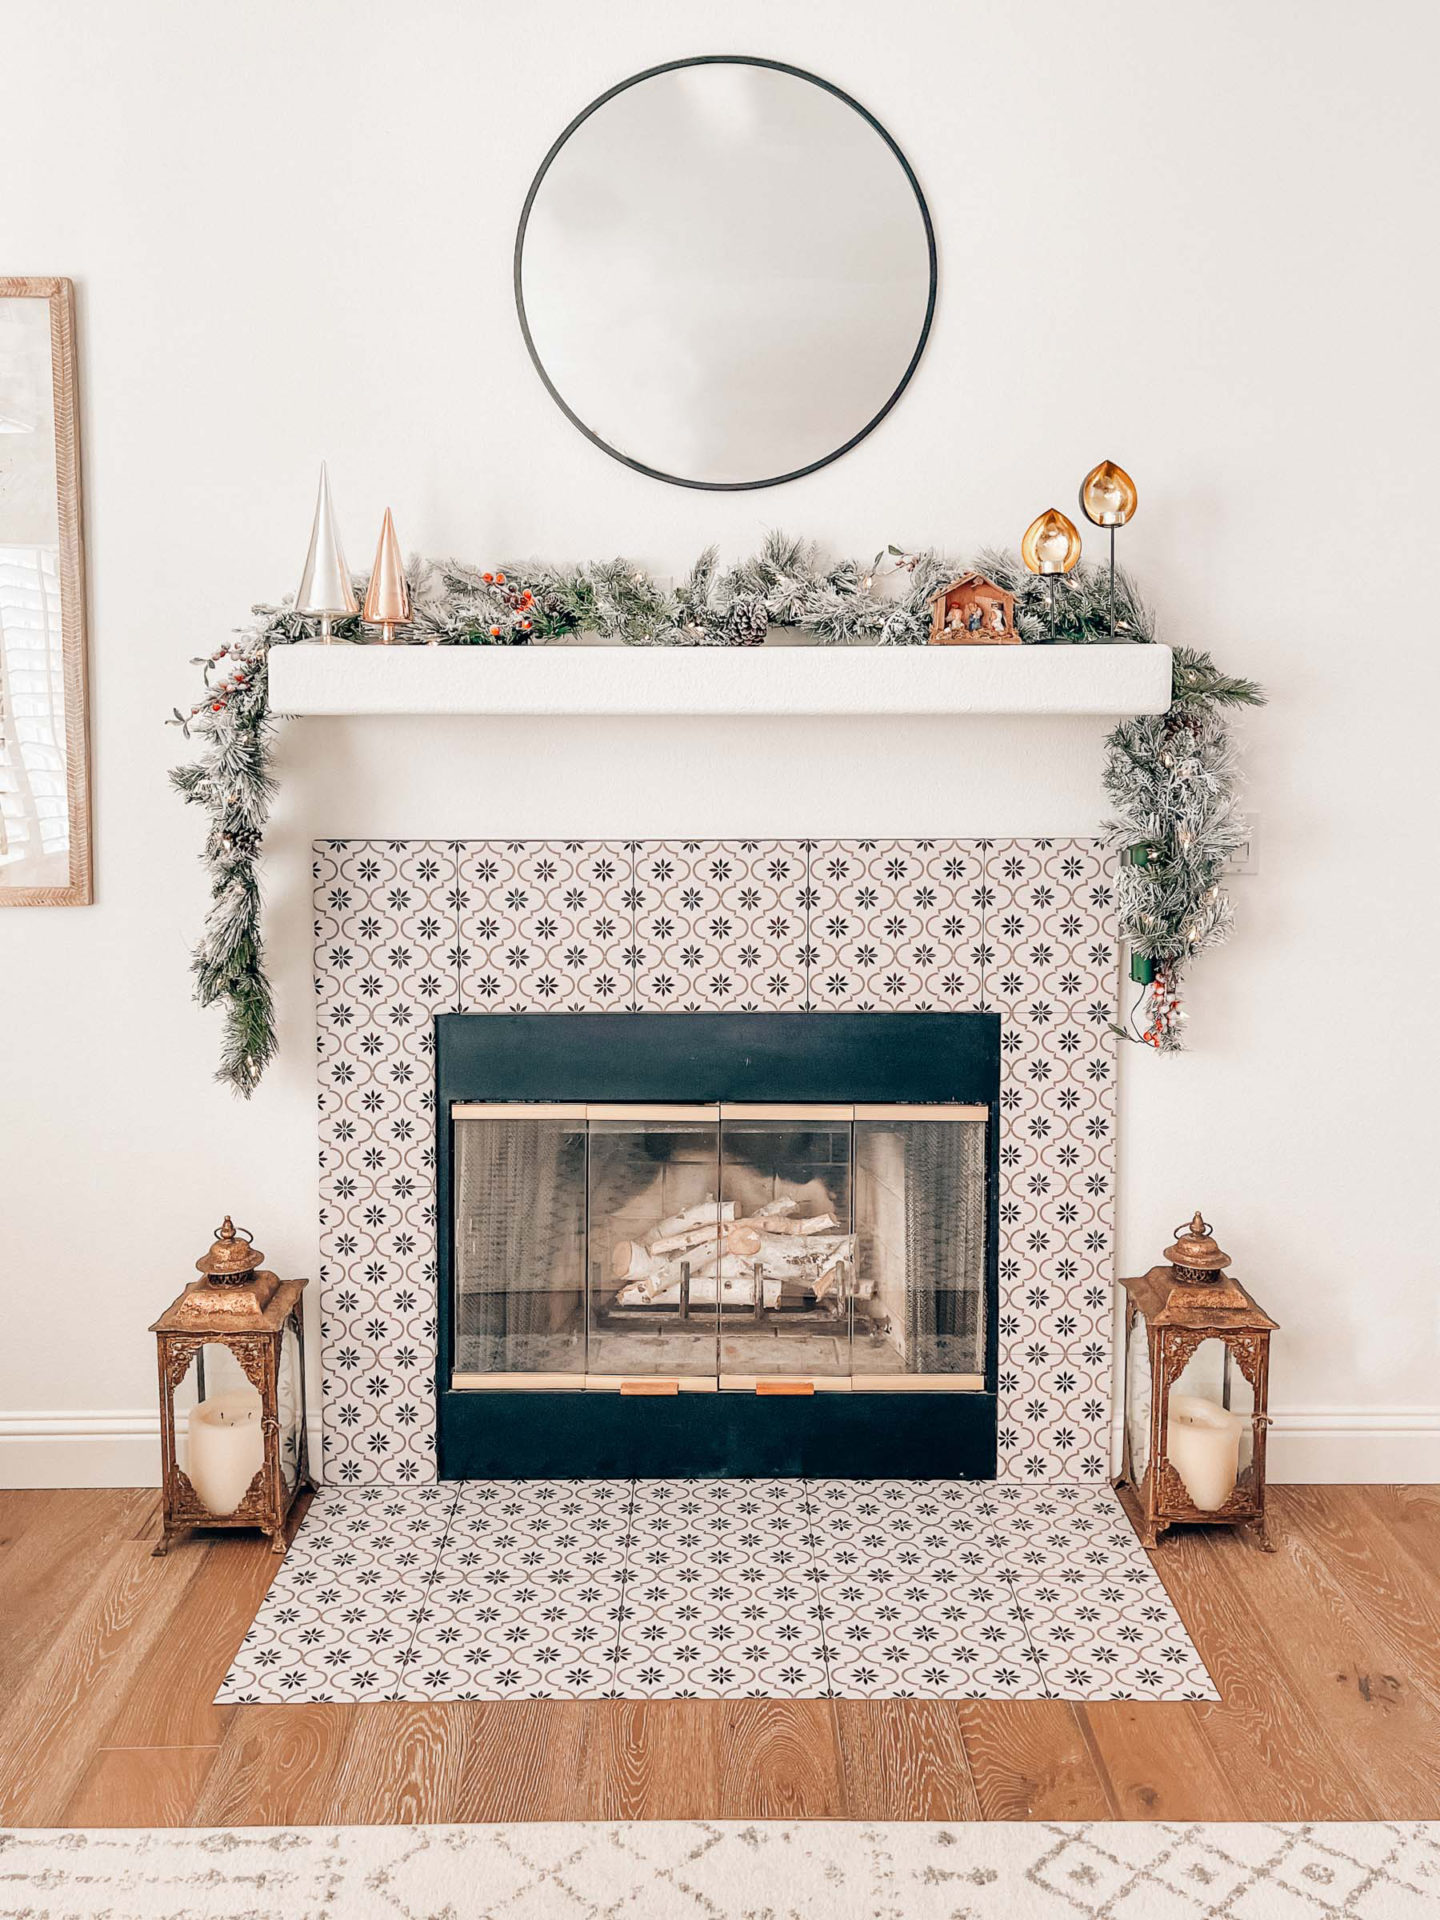
Overall, this project took us about three hours. Not bad at all! And we’re so happy with how it turned out! Instead of a black eye sore in our living room, I look over and see our cute Scandi-Boho fireplace and it makes me smile every time! It’s so much more cohesive with our furniture and wall art now instead of sticking out. Plus it looks so festive with our holiday decor—I’m including a pic of our Christmas fireplace!

If you’re considering doing stickers for your fireplace, I say do it! It’s obviously much more cost-effective than hiring a contractor to tear out and replace the tile for thousands of dollars. The stickers we got cost $235 (and I think that was probably on the higher side because we asked for a custom print job to accommodate the smaller tile patterns on one tile square), and this included shipping.
Hexagon Decor has so many fun tile prints—there were a bunch that we were eyeing and it was hard to narrow it down, but ultimately we love the one we picked. And any of the prints that you see on Hexagon Decor’s Etsy shop have customizable color options, so you’ll definitely be able to find the right colorways for your home.
Btw, I’ve seen these used on kitchen backsplashes and bathroom tile before too! I’m thinking our next project might be our wet bar counter.
If you give these fireplace stickers a try, or use the tile stickers on another part of your home, tag me in an Insta Story, I wanna see!
Looking for more home decor inspo? Find it here!
Laundry Room Wallpaper Makeover
Framebridge Gallery Wall Reveal
Sherwin-Williams Greek Villa


Elise Armitage is an entrepreneur and founder of What The Fab, a travel + lifestyle blog based in California. At the beginning of 2019, Elise left her corporate job at Google to chase her dreams: being an entrepreneur and helping women find fabulous in the everyday. Since then, she’s launched her SEO course Six-Figure SEO, where she teaches bloggers how to create a passive revenue stream from their website using SEO. Featured in publications like Forbes, Elle, HerMoney, and Real Simple, Elise is a firm believer that you can be of both substance and style.


Sarah
Sunday 1st of October 2023
Where did you get the "unlit fire" decal??