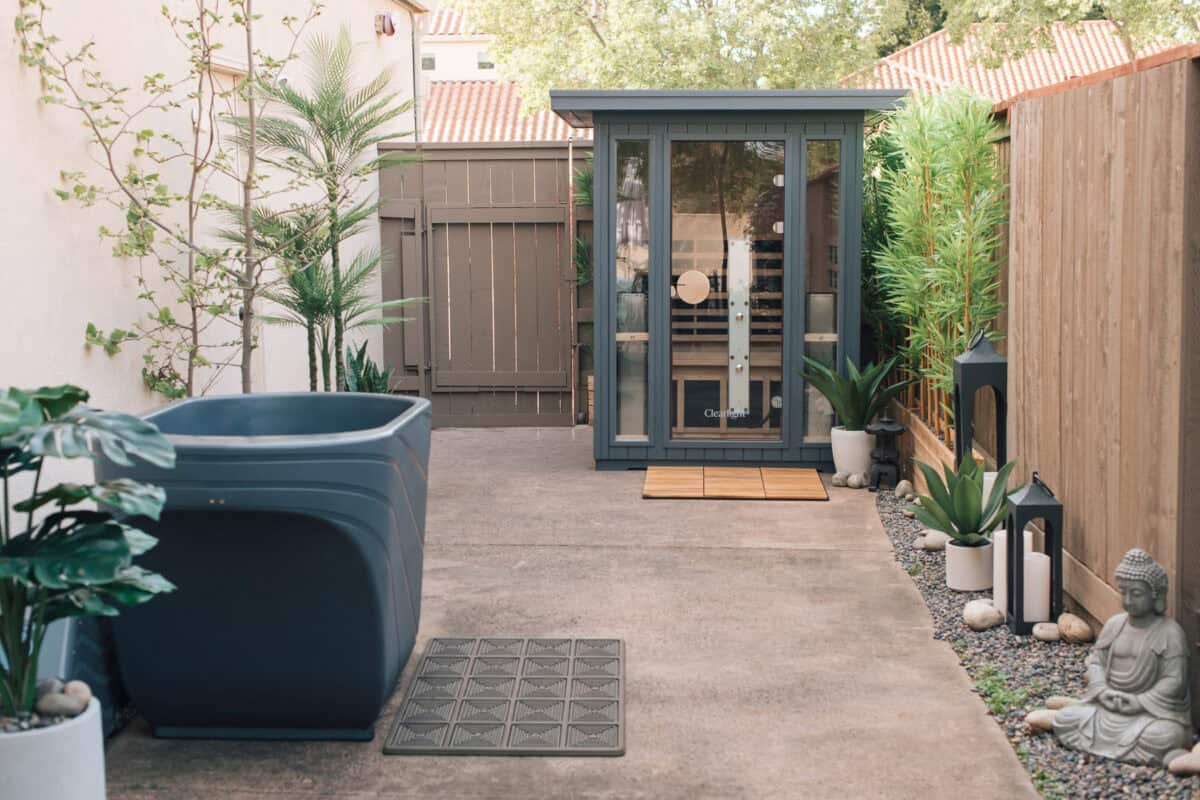
If you’ve been collecting outdoor spa ideas, building one in our backyard might be the best thing I’ve done all year—and it started with a sad, awkward side yard we’d basically turned into a dumping ground. You know the type. Long, narrow, no real purpose, just a spot where random pots and large items that needed to be hauled away went to die.
This year I decided to make it my healthiest, hottest, happiest year yet, and a huge part of that was carving out a space at home where I could actually slow down. So I’m walking you through every element of our outdoor spa—the cold plunge, the infrared sauna with the red light therapy, the greenery, all of it—plus the one thing I’d absolutely do differently if I started over.
Why I Built an Outdoor Spa in the First Place
I didn’t want another corner of the yard that looked pretty and never got used. I wanted a space that pulled me outside every single morning.
My vision was simple but specific: hot and cold therapy, red light therapy, and a calm, zen-garden feeling the second you walk in. That awkward side yard turned out to be the perfect canvas because it was tucked away and private—exactly what you want when you’re stepping out of a sauna in a towel.
The best part? You don’t need a giant yard or a renovation budget the size of a down payment. You just need to pick your must-haves and build around them. Here’s everything we added.
Everything in Our Outdoor Spa Setup
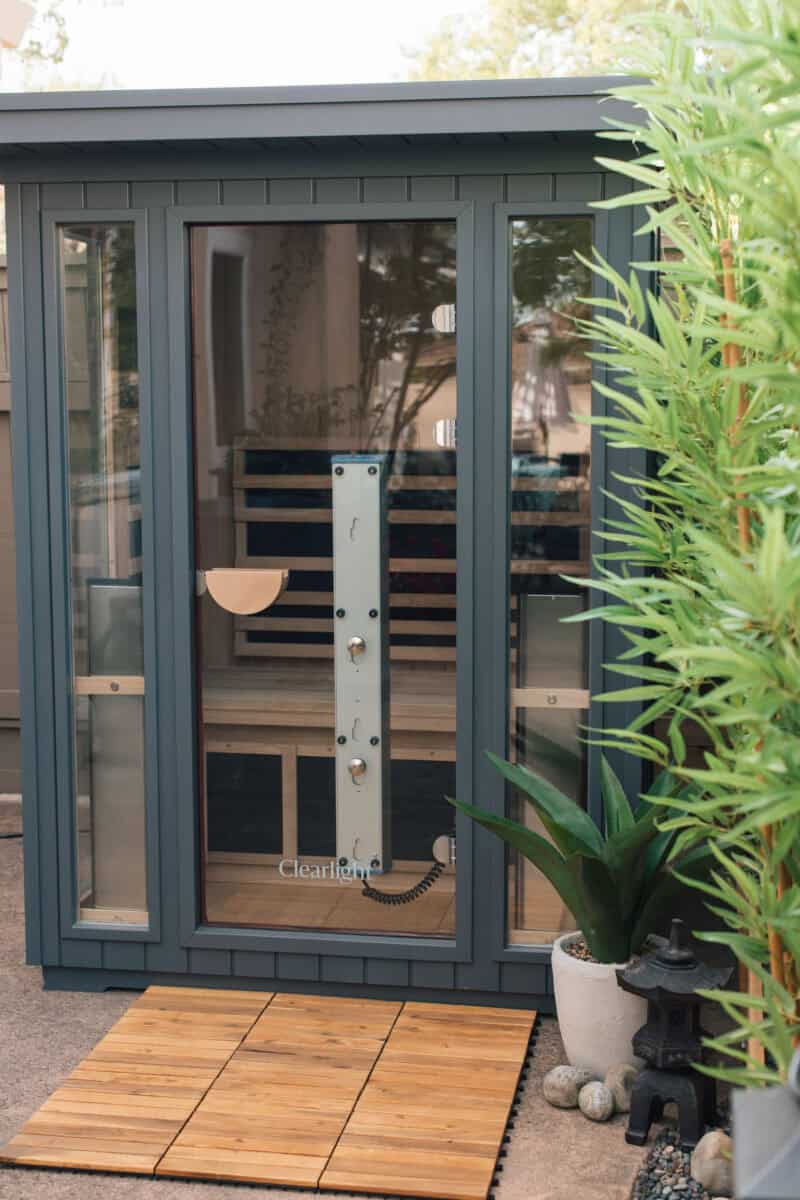
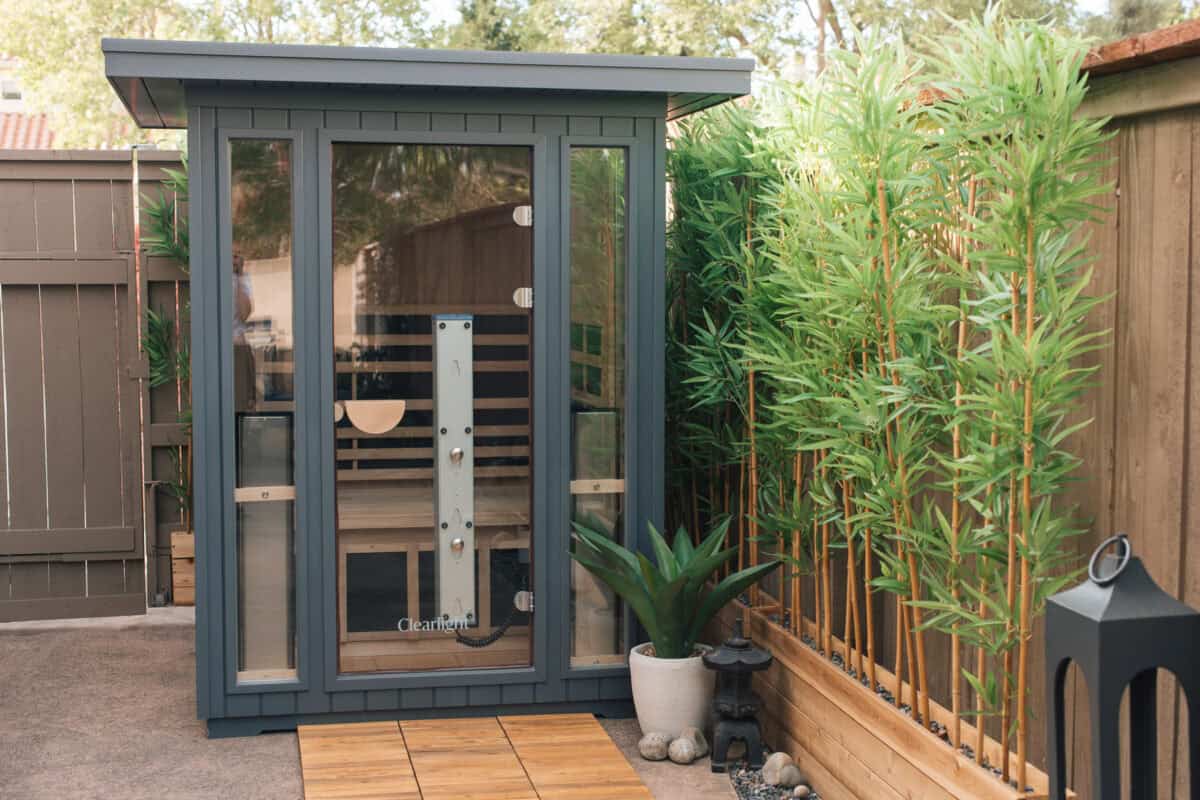
1. The Infrared Sauna
When I first had this idea to turn this space into an outdoor spa, the number one thing I knew I wanted was an infrared sauna. Ours is a Clearlight infrared sauna, and I hop in after every workout—it’s become the part of my day I look forward to most!
There are speakers inside, so I connect my phone and listen to a Headspace meditation while I sweat it out. You can also control the whole thing from an app, which means I can get it heating up before I’ve even finished my workout.
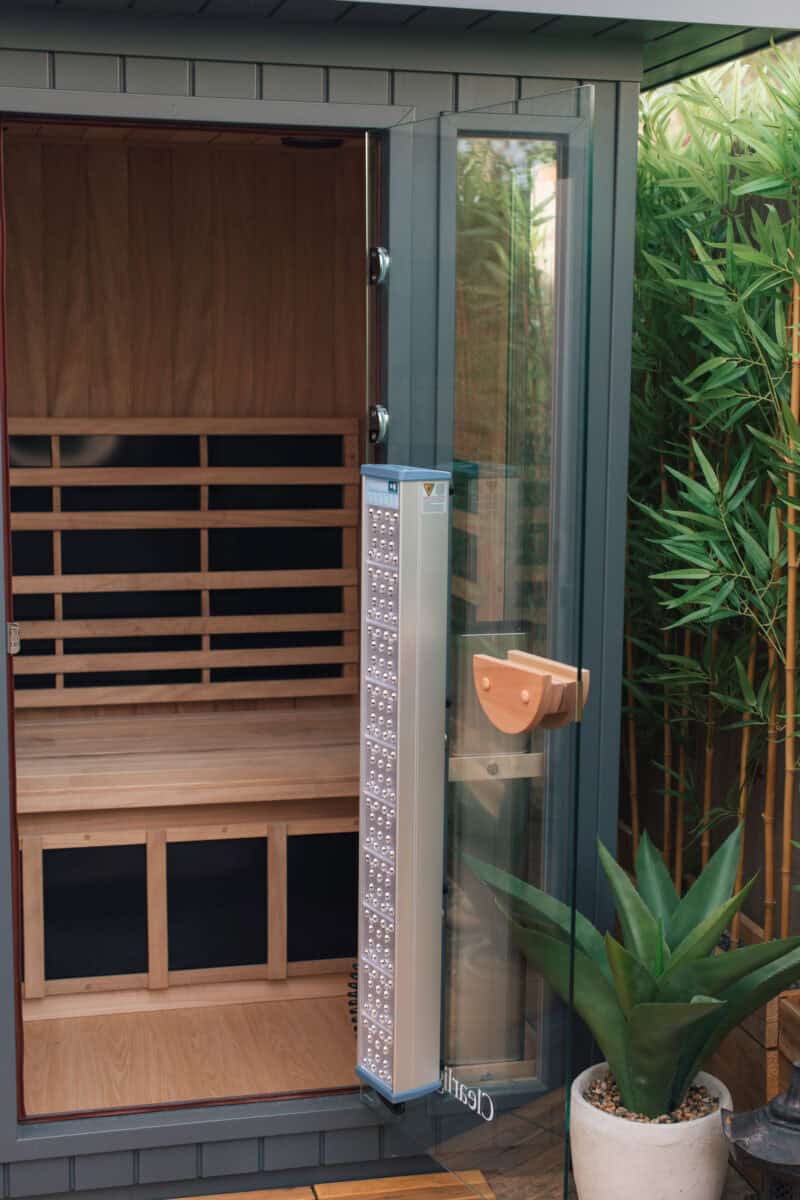
Tucked right inside the sauna, we have a red light tower, so I get red light therapy while I’m doing my sauna session. Two birds, one very relaxing stone.
I love that it stacks into a routine I’m already doing instead of being one more thing to remember. Sit down, start my meditation, soak up the red light, sweat—that’s the ritual.
If you’ve been curious about red light but didn’t want to buy a whole separate device, building it into your sauna is such an easy win. You get the glow, the warmth, and the wind-down all in one spot.
There are so many amazing health benefits to sauna-ing and red light therapy, including detoxification, increased metabolism, and weight loss with regular sauna use (I am for 3 – 5 times a week). Red light therapy helps promote skin health and alleviate muscle and joint pain by lowering inflammation and boosting cellular energy.
Now for an honest hot tip, because I love you and I don’t want you to go through what we did: building the sauna is NOT for the faint of heart. My husband and I put it together ourselves, and the walls and panels are extremely heavy and so difficult to maneuver. And I’m saying that as someone who is strong and lifts heavy weights.
We ended up having to hire two strong, tall guys to get the roof on. If I could go back, I’d hire a pro to build the whole thing from the start. Trust me when I tell you—assembly is a workout in itself.
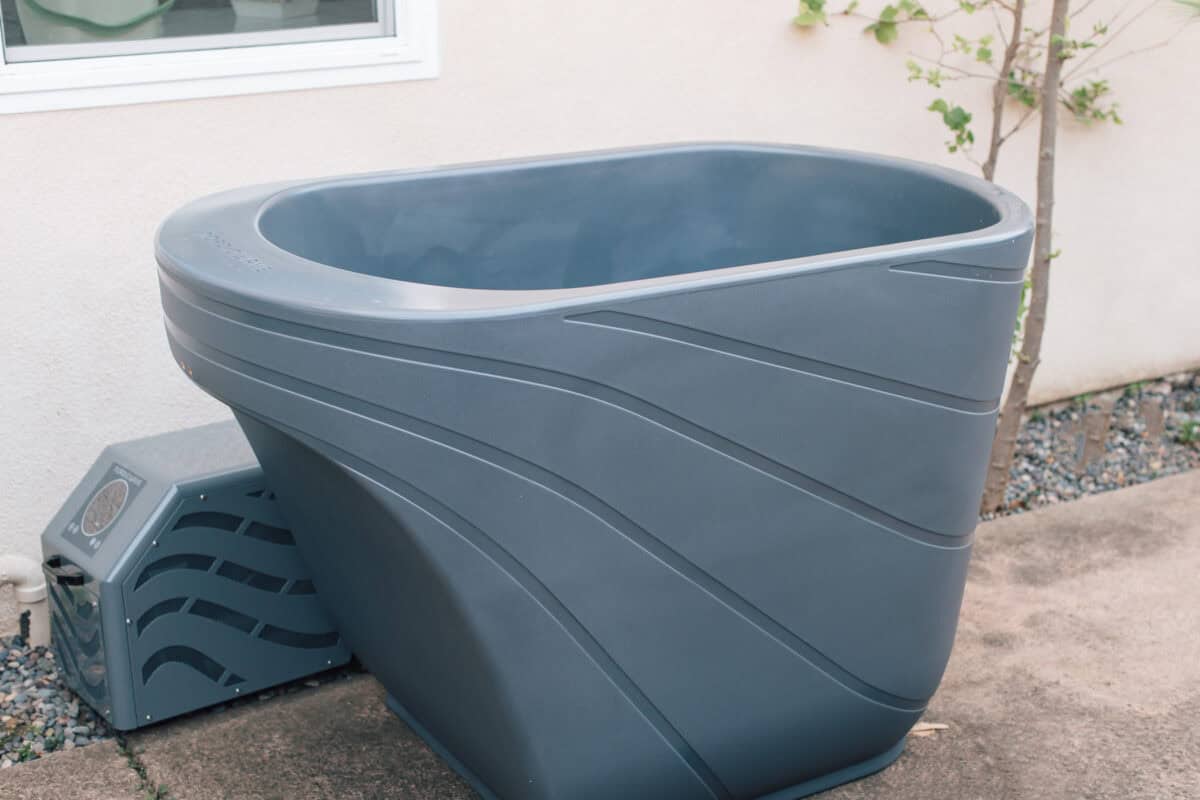
2. The Cold Plunge
Our cold plunge is from Nordic Wave, and I did a ton of research on cold plunges before deciding on the Viking Hybrid.
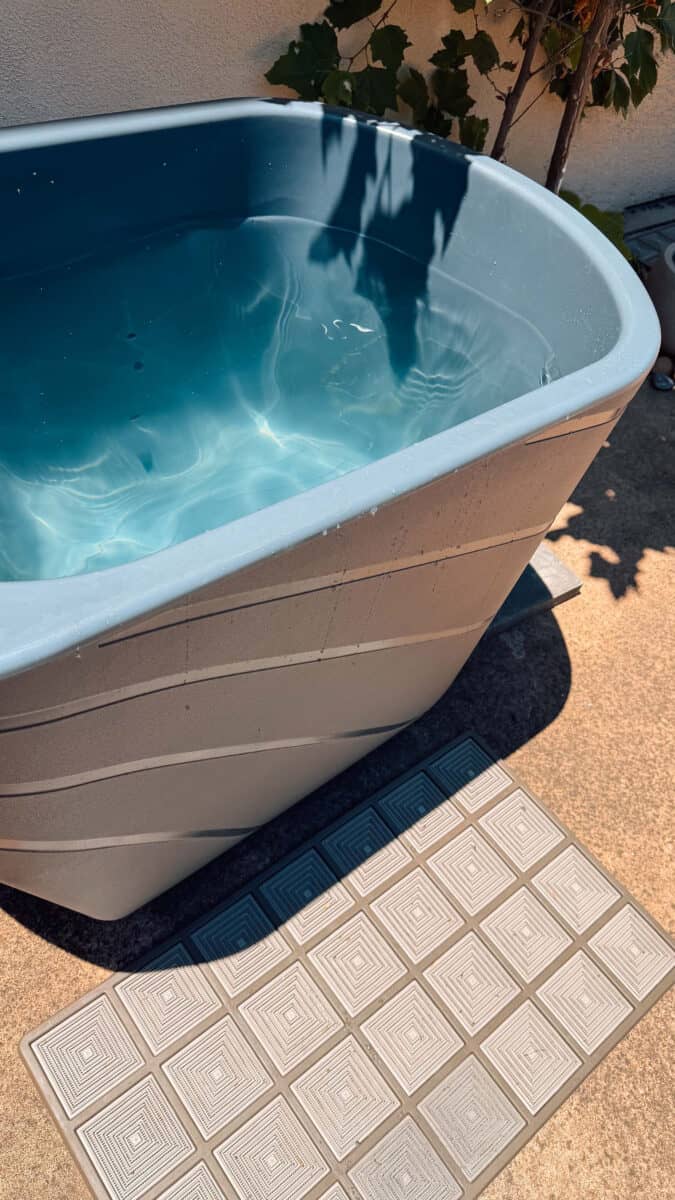
I love it because it’s compact and you sit upright in it, which is generally considered better than lying horizontal for cold plunging because it makes deep, controlled breathing much easier. And because it’s a more vertical plunge, it doesn’t eat up your whole space the way a big horizontal tub would. It comes with a quiet little chiller that sits off to the side and circulates and cools the water—no hauling bags of ice every morning, which was a nonnegotiable for me.
The app is what sold me. I have ours set on a schedule to turn on every other morning, because that’s how often we plunge, so the water’s already ice-cold and ready when I walk out. You only need two to three minutes in there, and I genuinely feel amazing after—more energy and clearer head.
Cold plunging also has weight loss primarily by boosting metabolism and activating brown fat, and improve insulin sensitivity. Love!!
Setup was way easier than I expected too. It was delivered right to my side yard, unboxed for me, and the large cardboard was hauled away (#bless). I watched a tutorial video from Nordic Wave and connected the tubes and hoses, and we were good to go!
I also love that the maintenance is simple. We don’t have to add chlorine or chemicals to the cold plunge because the water is drained and replaced every month, and the automated settings keep the water circulating and moving periodically.

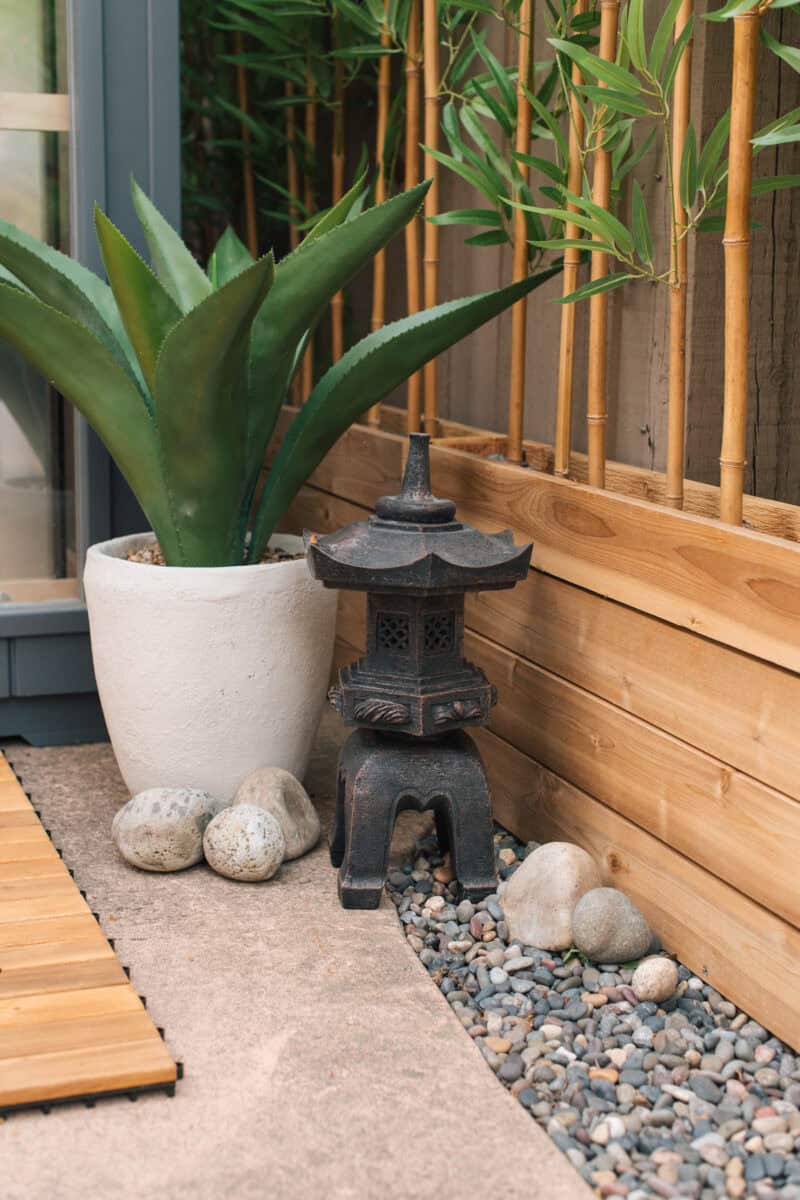
3. Faux Greenery for the Zen Garden Look
This area was pretty bare before, and I really wanted that lush, zen-garden feeling. I had a whole vision of a palm and a fiddle leaf fig tree next to the cold plunge.
Here’s the thing though—I did not want to mess with sprinkler systems or babysit real plants in that spot because they would surely die when I would inevitably forget to water them. So I went with faux greenery from CG Hunter instead, and it’s one of my favorite decisions in the whole project.
The quality is honestly insane. They look so good that people don’t realize they’re faux until they touch them. I also grabbed a couple of their lanterns, plus some solar-powered faux candles from Amazon for that warm, flickery glow at night.
Here are the exact pieces I picked out from CG Hunter. And you can use code ELISE15 to get 15% off!
7′ Palm tree – The perfect faux palm tree. I love it so much!
4′ Monstera plant – This one sits by the cold plunge and it’s absolutely gorgeous! It’s bringing my vision for a lush zen garden to life.
Snake plant – Perfect for hiding a large, ugly outlet cover.
I also wanted to note that for taller faux plants like the palm tree and the monstera, adding rocks to the pot was essential so that they wouldn’t get tipped over by a strong wind. After I added rocks, we had zero problems, and I actually love the look of the added rocks. It just goes with the Zen Garden vibes!
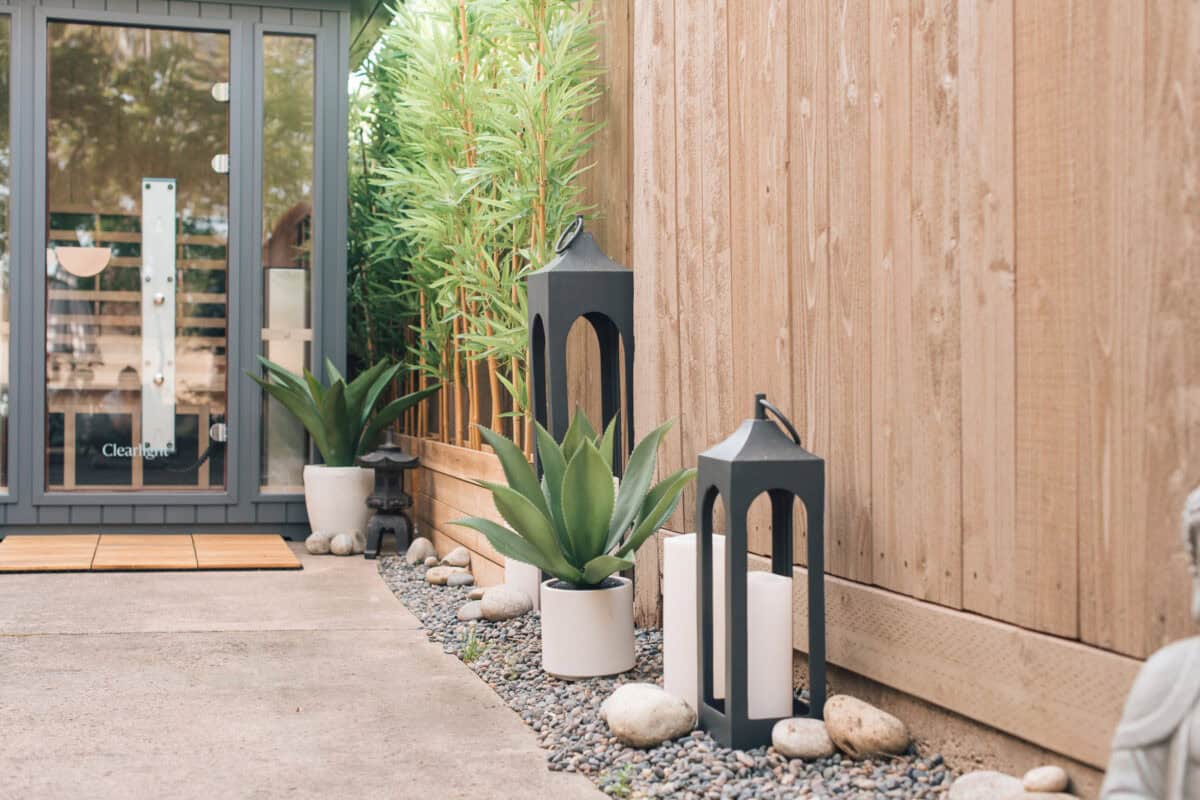
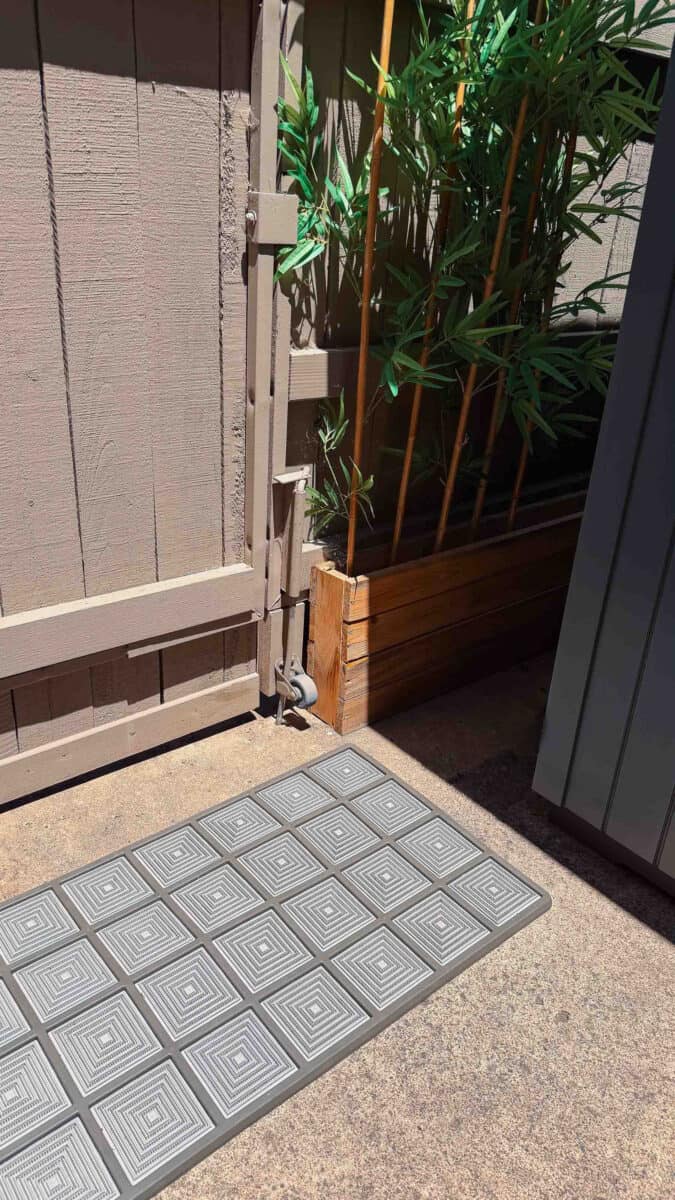
The last piece of faux greenery that I knew I wanted was tall bamboo surrounding the sauna. Since CG Hunter doesn’t currently have faux bamboo, I found some at Home Depot, and they were perfect. Omied built these planters to be the perfect size, and it just adds some lushness and softness around the sauna.
4. The Little Decor Touches That Tie It Together
The big pieces do the heavy lifting, but the small stuff is what makes it feel like a real retreat. I scattered a few Porte + Hall doormats around the space so I can brush leaves and dirt off my feet before I step into the cold plunge, plus ones by the garage door and entry. They make the space feel more welcoming and warm, and their doormats are very chic. You can use code WTFAB15 for 15% off!
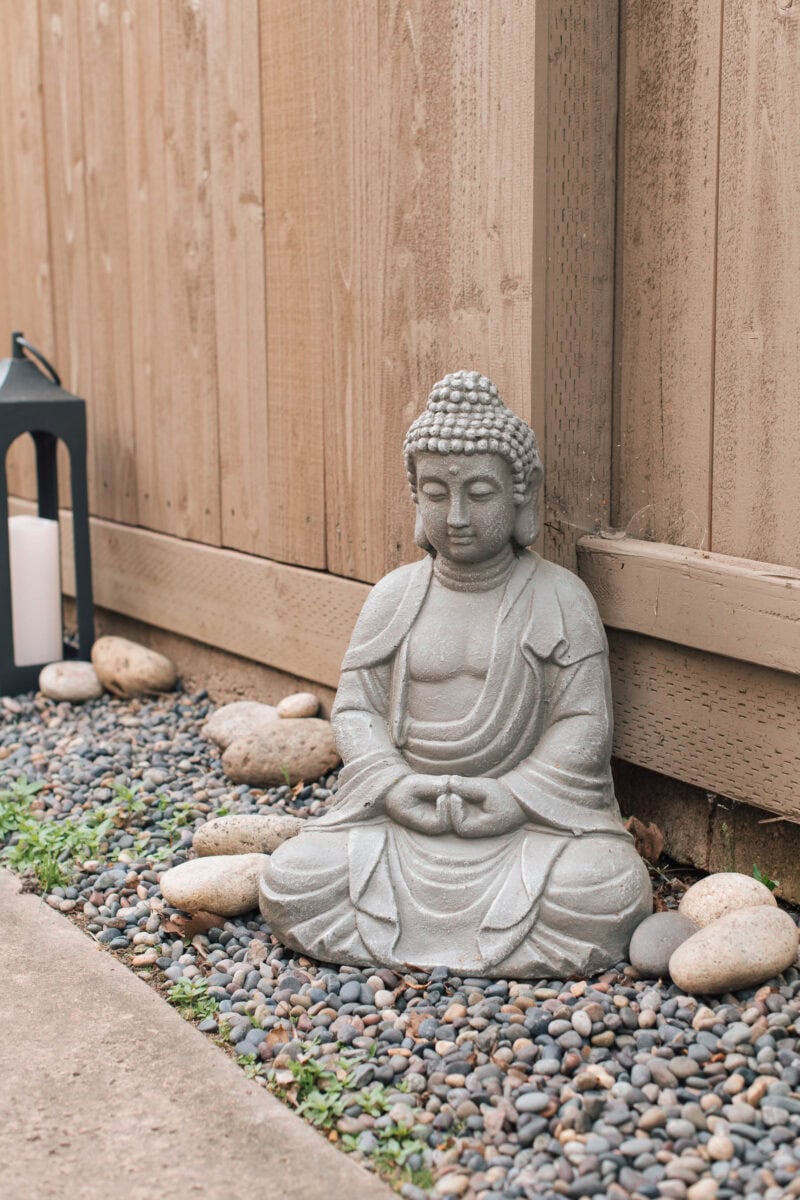
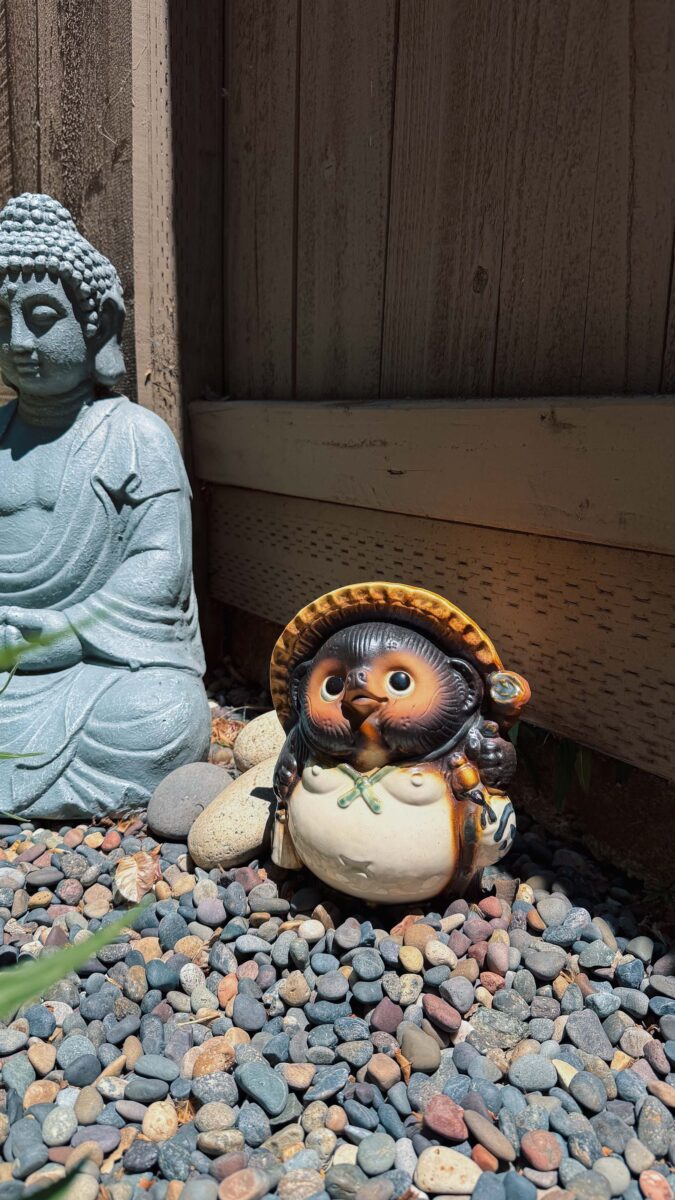
Then came the decor and personal touches. I had to have a Buddha, obviously. And next to it sits a Tanuki—these cute/funny little statues are everywhere in Kyoto, outside homes and restaurants, and they’re meant to bring good luck.
We brought ours home from Japan specifically for this garden, so every time I walk past it I think of that trip. Little touches like that turn a setup into a space that feels like you.
I also loved this little Japanese pagoda statue that I found on Amazon, and it complements the space so well.
How to Plan Your Own Outdoor Spa
Budget-wise, here’s a realistic look. A home infrared sauna usually runs between $3,000 and $10,000 depending on size (Clearlight offers 0% financing), and a quality cold plunge like the Nordic Wave is about $5k. Depending on how lush you want to go and how much faux greenery and decor is needed, I’d budget $2k. Now is a really good time to make these purchases, as a lot of these places currently have Father’s Day and 4th of July sales going on.
You would also likely need to convert one of your power outlets for the sauna—ours required a 240V dedicated circuit (120V is standard). Getting this electrical work done and routing a second outlet for the cold plunge cost us about $2k.
A few other helpful planning tips to keep in mind: leave a few feet of clearance around your sauna door so it can swing open fully, and plan spacing behind the sauna for rain drainage. Also measure electrical specs beforehand—you cannot use an extension cord with the sauna so you’ll want to make sure it can reach your outlet!
And if you’re assembling a sauna yourself, budget for help—see warning above. 😉
Come Hang Out in My Spa (Virtually)
That’s the full scoop on our outdoor spa—every element, every splurge, and all the assembly tips. I use this space almost every single day, and it’s made this whole healthiest-year goal feel so much more doable and enjoyable.
If you’re thinking about creating your own outdoor spa space, do it. Seriously. Start with one piece and grow from there.
If you have any questions about any of the products, shoot me a DM on Instagram (@wtfab). And if you end up building your own little retreat, please tag me—I want to see it!


Elise Armitage is an entrepreneur and founder of What The Fab, a travel + lifestyle blog based in California. At the beginning of 2019, Elise left her corporate job at Google to chase her dreams: being an entrepreneur and helping women find fabulous in the everyday. Since then, she’s launched her SEO course Six-Figure SEO, where she teaches bloggers how to create a passive revenue stream from their website using SEO. Featured in publications like Forbes, Elle, HerMoney, and Real Simple, Elise is a firm believer that you can be of both substance and style.